Showing posts with label equipment. Show all posts

Monday, March 28, 2016

Wide Angle Lenses - How to choose, How to use

Topic

Interested in wide angle photography?  This article walks though how to use a wide angle lens and how to shop for one.

What is a wide angle lens?  Let's literally take a look:


In the photo above, the outer blue box shows the view from a wide angle lens (a 15 mm full-frame equivalent with a 110 degree field-of-view).

The inner blue box shows the framing you would see from a typical cell phone camera if you were standing in the same spot. (40 mm equivalent with a 56 degree field-of-view)

With this example cell phone, you could back up to get more rocks and shore but this is not going to give you the same image as the wide angle.  For starters, the distant shoreline won't change much in size when you move back, making it much larger in the 40 mm than it currently is in the 15 mm version.  Essentially, the relative sizes of all near and far objects will be less different with the longer lens.

Thus the only way to get the same wide angle image with our example phone camera would be to do a panoramic stitch.

Uses

The main uses for a wide angle lens are:

Landscape

Canon Beach - taken with a 15mm lens (APS-C) with an 88 degree FOV


As shown above, a wide angle lens can capture more of the overall landscape scene in a single image and thus provide a "different" look than what most people can achieve with their phones or travel cameras (unless they do a panoramic shot and these don't always work out well).

Interior

Wide angle lenses give interiors a feeling of "spaciousness" (15mm image shown)
Wide angle lenses also make car interiors look larger, as this 11 mm image shows.

Real-estate photographers usually opt for wide angle lenses when photographing interiors because the exaggerated perspective creates a feeling of spaciousness - making rooms appear larger in photos than they will in person.  Car interior photos are often wide angle for the same reason.

Architecture

A wide angle lens was used here to help show the scale and complexity this old railroad avalanche shelter

Architecture photos often use wide angle lenses, both for practical reasons (limitations on where the camera can be placed with a clear view), and because wide angle lenses give more options for cropping.  Cropping (or shifting) is needed when the photographer wishes to avoid keystoning effects.

An example of "keystoning" where angling the camera causes parallel lines to angle toward one another.  If this is not the desired effect, shooting the scene with a "leveled" camera, then post-cropping is one strategy.  Using a wide angle lens can help.

Less Popular Uses

To start, I'll say you can attempt to use any lens for any purpose but the following uses "go against the grain" and thus enter the realm of creativity.

  • Close Portraits: To get a person to "fill the frame" with a wide angle lens, you have to get the camera very close.  This creates personal space challenges which can make many people less comfortable.  The other potential problem is that the resulting image will reflect the close perspective, rendering a larger nose, smaller ears, and a unusually-shaped head.  Although this can be a fun way to be creative, people usually prefer traditional methods.
  • Macro or Product:  It's quite common for a wide-angle lens to be able to focus very closely, even an inch away from the front of the lens.  Outside of exaggerated perspective, the issue here is the effect of the camera lens on lighting - the lens can actually block useful light from reaching the subject!

Issues, With "Work Arounds"

Wide angle lenses are a challenge to use well and come with many inherent compromises.  This section attempts to cover the major ones.

Distracting Elements In The Frame

Because wide angle lenses capture so much in a single image, it can be a challenge to keep distracting elements out.  This can especially be difficult when starting out under a "single subject" compositional mindset.

My advice here is to shift compositional thinking to "whole image".  This means first looking for a favorable wide-angle environment, then looking for specific subjects after that.  I highlight some specific examples below:

A beautiful sky is a nice time to go with a wide angle lens.  The sky can cover a good portion of the frame in a complimentary way.  Water is another good compositional component for the same reason.
Oftentimes, the sky is not interesting enough to deserve space in the frame.  In this case, consider minimizing it in favor of more landscape elements.
Large areas of a given pattern can work well to simply an image and avoid distracting elements.

Finding A Subject

If your photo is built on a singular subject, you'll often have to get close to that subject or it will be too small to "stand out".  Some tips for doing this are shown in the images below.
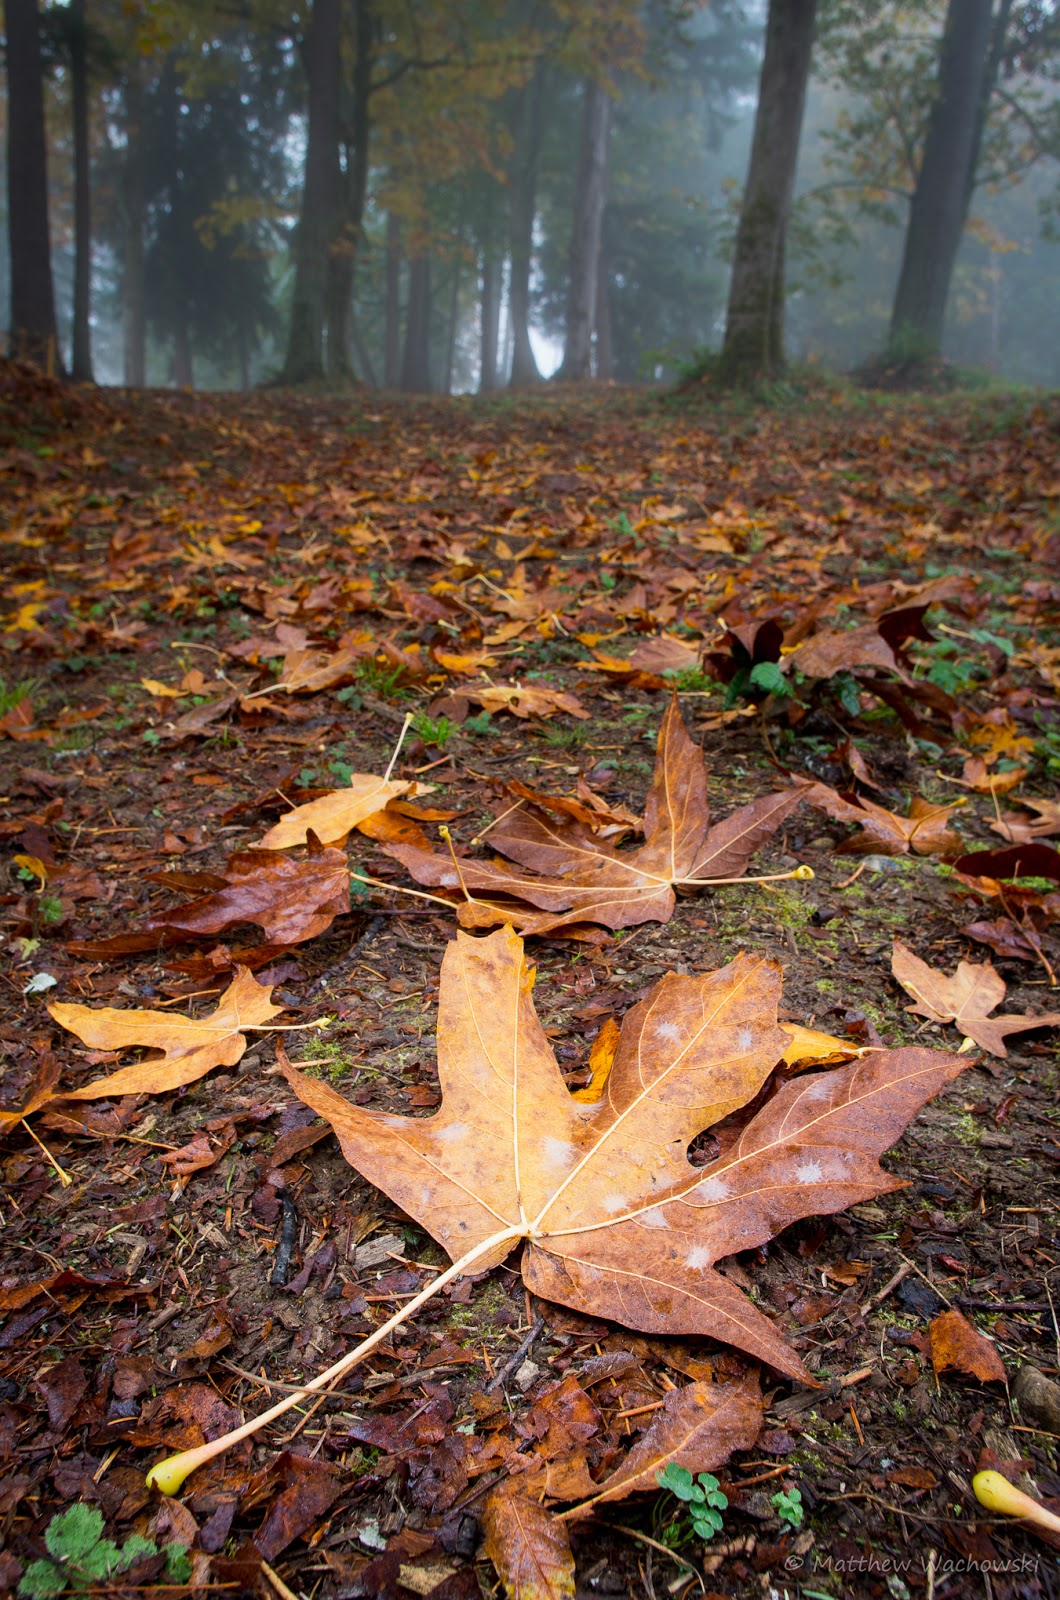


Getting the camera very low to the ground allows small objects to be used as a subject


Another option is to allow the subject to be small and build the composition to embrace this smallness

With natural subjects, such as trees, it's often possible to get very close without the resulting perspective distortion becoming bothersome.  This image was taken with a 10mm fisheye lens at a very close distance.

Subject Background Balancing

Background objects taken with a wide angle lens become very small, almost too small to be a part of the photo.  Because of this, distant features such as mountains should mostly be considered an "inconsequential" part of the composition.  Foreground objects and sweeping objects (sky, landscape) need to mostly carry the image.

An image of Mt Rainier with a 100 mm lens.  Long lenses make it easier to include background elements, although this feature can bring  with it a sense of two-dimensional "flatness" to the image. 


An image captured from the same shoreline with a 15mm lens.  See how Mount Rainier in the distance (left of center) has become nearly irrelevant to the composition?  Anything not close up or vast in wide-angle tends to become marginalized.

Distortion

It took me a while to realize this, but distortion can mean a combination of several separate issues:
  • Lens distortion:  This is a tendency for lenses to make straight lines look curved.  On some wide angle lenses, it's complex where lines in certain dimensions (say parallel to the frame) are straight where others (say toward the camera) have a curve.
  • Perspective distortion:  This is a natural distortion where objects that are actually to the side of the camera suddenly have to be projected onto a flat rectangle.  The result is strange-looking bending and warping near the edges of the frame.
  • Keystoning:  Oftentimes the effort of getting a good composition means tilting the camera up or down.  This action causes straight lines to bend toward or away from the frame.  The keystoning effect is not limited to wide angles but tend to be exaggerated by them.
Some examples:

Note the severe unnatural bend of the boat masts on the right.  This is a combination of perspective distortion and keystoning (angling the camera upward)

Another example, where boat masts become progressively more angled to the right of the fame

One workaround for these problems is to simply go a little less wide as the issue becomes increasingly harder to keep under control as you go wider.

Another is to try and place objects without obvious proportions nearer to the frame edges.  Natural objects like water, rocks and trees tend to work well.  Man-made objects like buildings and signs make it more obvious that something is "off".

A third method is to try and keep the camera level to minimize the effect, perhaps with some post cropping after-the-fact.  This is a trade-off that you'll have to apply your artistic discretion toward.

Finally, you can simply embrace the effect, even try to exaggerate it - it's all subjective opinion at the end of the day, after all. :)

Field Curvature

Although it's natural to think of a focus plane as a flat plane in space, in reality it's never quite so simple. Wide angle lenses, in particular, have quite a difficult time keeping the focus plane "flat" (to varying degrees).  Also note that this curvature is a part of the design compromises in the lens, swapping copies of the same lens model is a frivolous exercise.

Why does it matter?  Mainly because you need to be careful how you focus.  If you don't then you can expect problems like soft corners that can otherwise be avoided.

To address this issue, you will have to see if and how much it's a problem for your lens.  If it's a problem, you'll have to experiment with what part of the frame you use for focusing.  For my favorite wide-angle, the "recipe" for best overall landscape focus is to focus about 1/4 away from the bottom corner of either frame.

What To Look For

This section talks about things to consider when purchasing a wide angle lens. 

Flare Can Be A Problem

By their nature, wide angle lenses capture light from many angles.  Designing a lens that keeps flare low in these situations is a challenge that many lenses (even expensive ones) don't meet too well.  To make matters worse, lens hoods often have to be sparse to prevent vignetting issues.

The best way to determine if a lens has too much flare is to rent or borrow it and decide for yourself.  You can also check a review site like lenstip.  Finally, you can visit a "samples" site like pixelpeeper or flickriver.  On these sites, you can choose the lens you are interested in and check out images with the sun or bright lights.

Don't Forget About Filter Support

Filters are quite useful in landscape photography.  ND filters can allow for long shutter speeds, showing the flow of things like leaves and water.  Polarizing filters can reduce glare on objects, improving color and clarity.  Even color filters are still useful in digital if you are using advanced techniques (like RGB channel balancing with ETTR).  We won't cover details in this article...

The issue I'm getting to here is that many wide-angle lens designs use a "bulb shaped" front element.  This design can improve sharpness but filters are difficult and often expensive to mount, requiring creative after-market approaches.

The Nikon 14-24mm is a lens of legendary sharpness.  Unfortunately it's flare resistance is only "OK" and adding filters to the bulb-shaped element requires expensive after-market workarounds.
The Pentax 15 mm contrasts the Nikon 12-24mm in nearly every respect.  Image sharpness is good, but not "legendary".  Then again, the flare resistance is excellent and inexpensive 49 mm filters can be easily attached.

Note that polarizers don't work too well on very wide angle lenses of any type due to the extreme light angles.  This leads to vignetting on the edges of the frame.  For moderate wide angle lenses, they are fine.

Good Manual Focus > Auto Focus

At least for most people.  The reason is that the depth of field is so large on wide angle lenses that zone focusing is effective.

This Sigma 10-20 has a "high speed internal motor".  I prefer a great manual focusing experience for this type of lens.


The Zeiss 21mm is $1800 and is manual focus only.  It's a very nice manual focus too...  Too bad the lens flares a bit too much.


Another reason is that, due to field curvature, you'll probably want to focus using magnified live view.  Manual focusing benefits from a long focus throw which autofocus lenses generally do not have, making live view focusing more precise.

For the reasons above, many of the most expensive wide angle lenses are manual focus only.

Focus Scales Are Nice

A lens with focus scales is nice with wide angle because you can "learn" what scale positions work well for certain shots.  This can save time and also provides a sense of confirmation that things are setup correctly.

No focus scales on the Sony 16-35mm.  This means there is no way to zone focus the lens and you'll have to do your best with the LCD.

Weather Sealing Is Nice

Although uncommon in less-expensive lenses, weather sealing is a nice feature in any lens intended to be used in outdoor landscapes

Weather sealed with focus scales and filter support.  A strong contender :)

Wide Angle Zooms Can Be Tough To Master

Basically, all wide angle lenses have their "quirks" like field curvature, flare, etc that you have to learn to predict and work around.  With a zoom lens, these quirks often vary by focal length, making it even harder to pre-visualize your results.

The complexity of zooms might also make decentering a higher risk as there is simply more that can go wrong.

I also found that it's not always obvious which wide angle focal length to pick.  For these reasons, I have gravitated to primes when using wide angles.

Software Stitching Can Emulate Wide Angle - Sort Of

In modern times, you can also put your camera (with a regular lens) on a tripod (or even handheld) and photography many images in a grid.  You can then use a tool like Hugin or Microsofts Image Composite Editor to stitch them together - and both tools are free!

The downside is that making a wide angle image this way is a lot more work.  Another problem is that movement in the frame can create big problems, even ruin an attempt completely.

Summary

Wide angle lenses can be a real asset and are quite a bit of fun to use.  That said, they are specialty lenses and often bring more problems than benefits in a "typical" photography scenario.

If you are interested in wide angle, my advice would be to rent before you buy and get a feel for what it's like to use such a lens.  I'd try a few from primes to zooms, even a fish eye, and simply see if it's something you enjoy.  Have fun!

Sunday, March 6, 2016

Choosing A Tripod

Choosing A Tripod


When staring photography, one point of confusion is often which tripod to choose.  I have some unfortunate news for you, if the tripod you choose is used often, it will likely be inadequate.

Why?  Because tripods are an endless list of compromises and the "best" compromise is going to depend on the photographic situation at hand.  When starting out, favorite subjects are often undecided and tend to evolve with the photographer.

As tripods compromise some qualities for others, often it's the case that multiple tripods best fill varying needs.  At the moment, I have five tripods, all of which are "best" at different things.

This article briefly explains why you need a tripod at all, then looks at different tripod features and which styles they cater to.

Cheaper tripods come included with heads while more expensive ones require you to purchase a head separately.  Tripod heads have their own set of trade-offs; I opted not to cover them in this article.  If you are looking for a quick head suggestion, many people like ball heads with Arca Swiss style plates.

Why a Tripod?

A tripod holds your camera for you and is able to do so with more stability that you will be able to manage without one.  This gives you many advantages for photographs where the scene is static enough to allow for careful positioning.  Some advantages include:
  • You can take the time to tune the composition.  This means checking edges of the frame and considering if a different perspective would be better
  • In many cases, a tripod makes shutter speed a free variable.  This allows you to shoot with optimal ISO and aperture settings to maximize image quality.
  • If you would like to shoot HDR or focus stack, a tripod will keep the camera in a static position between shots
  • You have the option to do really long exposures, keeping the shutter open for several minutes, or more!  The resulting photos can be quite exciting.
  • A tripod lets you try several back-to-back shots with only one parameter changed.  For example, if you are not sure which aperture setting you want for a photo, you can try a few different ones while keeping the framing fixed.
I would say that if you shoot primarily landscape or still-life macro, then a tripod is a huge asset.  Shooting moving things tends to make a tripod less useful.

What about image stabilization?

Many cameras provide image stabilization features.  Image stabilization basically works like an unreliable tripod "on demand".  Unlike a tripod:

   - You can't 100% rely on image stabilization
   - You can't take identical shots back-to-back
   - You can't do longer exposures

That said, when taking a tripod is not possible or highly inconvenient, image stabilization can "bridge the gap".  Another nice thing about image stabilization is that there is no setup required, which makes image stabilization convenient for dynamic situations, like wildlife.

Tripod Attributes

This section talks about attributes that all tripods have.

Material

Left-to-right: Aluminum, Carbon Fiber, and Steel
The main materials you'll find for tripod legs are aluminum and carbon fiber.  It's also possible to find steel, wood, plastic, and various other materials.

Between aluminum and carbon fiber, carbon fiber has a slight edge in weight and stiffness.  Carbon fiber also generally costs 2-3 times more for the same model.

If you are going for pixel-perfect images, you might also consider that some materials are more prone to vibration from shutters and mirrors.  I'm not an expert here, but know that materials like carbon fiber and wood tend to dampen vibrations a little better than aluminum.  This will mostly be a concern when using very long lenses or with macro work.

Outside of the legs, there are also the joints locking mechanisms which vary in quality.  As you'd expect, there is a correlation between higher quality materials and price.

Weight & Bulk

Due to varying materials and leg section counts, tripod weight and bulk are separate consideration


How much the tripod weighs mainly affects how nice it is to carry.

Intuitively, you might also think that more weight means more stability.

While this intuition is correct, it overlooks the fact that tripods with hanging hooks allow to you make them almost arbitrarily heavy.  I often use my camera bag to do just that.  Thus leg stiffness can actually make a bigger practical difference than carrying weight.

Separate from weight is bulk.  A bulky tripod may not be easy to attach to a smaller bag, even if it's lightweight.  I actually have this very situation where my lightest carbon fiber tripod can't really be used as my "everyday traveling tripod" simply because it's too bulky to fit on my bag.

Leg Section Count

Four leg sections verses three.
Fewer leg sections lead to an inherently stiffer tripod but also one that has more "bulk" than one with more sections.  Basically, each leg joint serves as a point where additional flex can occur.  Money can partially fix this with stiff carbon fiber and higher-end joints but nothing quite matches the stability of no joint at all.

Maximum Height

Center post extended (taller) and not extended (shorter).

The trade-offs of bulk vs leg section count combine to determine a tripod's maximum height (without the center column extended).  Said another way:
  • With fewer leg sections, you'll have either a bulkier tripod or a shorter maximum height.
  • More leg sections allow for more height, but compromise relative stiffness
Beyond the maximum leg height, additional height can be achieved via an extending center column.  Extending this column compromises tripod stability by raising the center of gravity.  If setting up in windy conditions, you'll want to take care with a high center of gravity or your equipment might take a tumble.

Minimum Height

Two ways to get the camera low, each with it's own trade-offs.


The minimum height of different tripods varies.  The main factor here seems to be cost and complexity.  Simply not allowing a height lower than the center column length keeps things cheap and simple.

Many photography applications have little need for low heights.  If you shoot landscape or macro, however, you should give this feature consideration as it will allow for those creative "wow" angles that can make a difference in your results.

The mechanisms that tripods use to allow for lower heights are:
  • Reversable center column
  • Split Center Column
  • Extra Center Column
  • 90 degree Center Column
  • Rotatable Center Column. 
These are all described in the features section later.

Maximum Load

Maximum load is how much weight a tripod says it can carry.  One problem with specifications here is that they are "marketing" numbers and it's hard to know what they are referring to.  In any case, I'd recommend simply making sure you have some margin to work with and read user experience reviews.

Mounting Screw

There are two standards, 1/4-20 (smaller) and 3/8-16 (larger).  The former is generally reserved to smaller tripods that also come with heads.  Most other tripods will use 3/8.  It's possible to convert one to the other quite cheaply with adapters although doing so suggests that the tripod and head are not well-matched in capacity. 

Tripod Features

These sections briefly describe different features that a tripod might have and offer suggestions on why you might care.

Center Column Features

Invertible


An invertible center column allows you to mount the camera under the tripod.  This is a great way to use the tripod as a "copy stand" alternative to scan film or photograph small items from above.

This can also be used for low-to-the ground shots, although the fact that the camera is located in the center of three tripod legs can sometimes hinder camera positioning.  There may also be the inconvenience of having to operate the camera upside-down.

90 Degree Orientation

Creative Potential: Excellent  Stability: Not Excellent


These type of tripods (mainly by Manfroto) allow the center post to be positioned at a 90 degree.  The design of these tripods allows this maneuver to be done quickly.

This position can be useful for macro shooting where the camera legs would otherwise impede the best camera position.  It also allows for nice close-to-the ground shooting with more convenience and fewer compositional limitations than the inversion approach.

Yet another use case is overhead shots where the camera is pointing straight down.

Note that a 90 degree mount is inherently less stable than approaches that keep the camera centered between the legs - you'll need to take care when using it.

Swinging

Some tripod designs allow the center column to be "swung" at a variety of angles, not just 90 degrees.  This is a really flexible feature offering the benefits of 90 degrees and more.  The stability downsides of a 90 degree tripod do not improve here and in fact may be worse.

Splittable

I used to own a splittable center column.  Now I own half of one...


Some tripods have threaded center columns that can be split into two parts.  When the column is separated, the tripod to go much lower but there are drawbacks:
  • It's possible to leave the detached center column at the photo site.  I did exactly that with mine.
  • There are temperature concerns.  Metal expands and contracts based on temperature.  Screw together your center column outdoors, bring it inside where the temperature is quite different, and now you need tools to get it apart again.

Replaceable

Some tripods are boxed with two center columns -- a long one and a shorter one for low shots.  I think this approach is somewhat inconvenient for most people because keeping track of and switching this extra part is burdensome.  If you have clever logistics in place and don't mind the extra hassle, then it can work out.

Weight Hook

This tripod lets you attach accessories to the bottom post, including hooks for bags or weights


A hook or screw at the bottom of the center column gives you a place to put your camera bag or something else heavy to give the tripod more weight and a lower center of gravity.

The downside is that the hook can make the column more difficult to remove.  The hook location also may be too close to the ground to hang weights in some cases.

Leg Features

Retractable Spikes

Retractable spikes can make a tripod more stable in landscape shooting.  A downside is that the retraction "holes" can readily collect dirt, redepositing it randomly where the tripod is used.

Twist Locks (vs Flip Locks)


Here, I am talking about the lock for tripod leg sections.  Twist locks allow for smoother/quicker motions.  Flip locks leave no question about what the tension should be.  I consider it to be a minor difference, for the most part.

Other Features

Attachable accessories


Some tripods have secondary screw mounts where you can attach a variety of accessories, such as secondary arms.

Apex Hook


Some tripods have a hook where the legs meet (apex).  This can be used to hang weights or your camera bag.

How to Choose


You can go with a special purpose tripod or a "jack or all trades" one.  To decide, simply identify what you will be using the tripod for.  If you are not sure, then you should get a "jack of all trades" one that is moderately priced for your budget.

Use cases and Features

The following section briefly states various use cases and what features (and attributes) are important for each.

Landscape

A landscape photo taken inches from the ground
  • Concerns: Carrying weight.  Maximum height.  Minimum height.  Bulk.  
  • Advice: This one is tough because many attributes offset one another.  Carrying distance will be a factor.  I recommend not skimping on a tripod for landscape use, go for carbon fiber if you can.

Macro

For this photo, I used the 90 degree arm to get a nice angle
  • Concerns: Adaptability.  Minimum height.
  • Advice: Another tough situation.  Being able to hold the camera at creative angles (such as with a 90 degree or swing arm) will be helpful for getting a nice angle.  Then again, keeping the camera stable is important too. 

Studio

Taken at home with off-camera soft boxes.  Tripod weight here was a non concern verses stability and versatility

  • Concerns: Maximum height.  Stability.
  • Advice: I chose this use case because it is so different.  Weight is rarely a concern here with many studios choosing to bolt their tripod (e.g. camera stand) directly to the floor.

Other

The above use cases are just examples, the key point is to think through how you will be using the tripod and choose trade-offs accordingly.  Good luck!


Saturday, February 13, 2016

Choosing A Lens - Beyond Just Sharpness

Choosing A Lens - More Than Sharpness


When many people talk about lenses, the conversation seems to gravitate toward sharpness and stay there.  Although sharpness is important, it's not the only consideration by far.  If you want better results from your camera and lenses, you need to think about lenses in greater terms than just their sharpness. 

This page describes many different aspects of a lens you might consider.  Throughout the article, I also try and describe when and why a particular aspect might matter.

How To Test

The best way I have found is to rent a lens you are thinking of buying for a week and use it as you would in "the real world".  It's also good to review the qualities listed below and explore the ones you think you might run into in your type of shooting.  I find Lens Rentals to be a reliable place to rent from.  Another approach is to borrow a lens from a friend or coworker.  E-bay and craigslist are also nice options if you are comfortable buying and selling.

Lens Qualities

I cover a lot of material in this article.  I thought about breaking it up but decided there is value in being comprehensive.   To support a a quick read, I try to summarize the key points of each section in the first paragraph.

Specification Aspects

Specification aspects are aspects you can find in a lenses specification sheet and are often present in the title of the lens.

Maximum Aperture

This is a set quality of a lens which specifies how large the aperture can be.

Credit: Wikipedia


Aperture is usually measured in f-stop, which is a ratio of focal length and aperture diameter.  For example, a 50 mm lens with an aperture opening of 25 mm is set to 50/25 = f/2.  Terminology can be confusing for beginners; here are the basics:

  • "Large Aperture" = "Fast Lens" = small f-stop number
  • "Small Aperture" = "Slow Lens" = larger f-stop number
  • "Stopping Down" means making the aperture smaller (increasing f number)
  • "Wide Open" means the lens is set at it's largest aperture (smallest available f number)

 Subjectively, a "fast" lens would offer a max aperture of f/2.8 or faster while a "slow" lens would be f/4 or slower.


A larger max aperture allows for less depth of field and, as a directly related effect, faster shutter speeds for the same lighting conditions.  A large maximum aperture can make the difference between getting enough shutter speed in lower light and not making it.

Larger max apertures also allow for more precise focusing (unless there is focus shift, which is described later).

For landscape and macro application, max aperture is less important.  It can even be a downside as the lenses will be bigger and thus harder to carry.  The larger aperture might also bring along a need for larger filter sizes and increased flare issues.

Nearly all "fast" lenses have more aberrations (described later in this article) "wide open" than stopped down a little.  Many modern lenses are trying to combat this with complex designs and finding some success, but there are always trade-offs.  One interesting one is that correcting for spherical aberrations too much can lead to less-pleasing bokeh - dang!

Larger max apertures, in theory, give a brighter image in optical viewfinders.  In most cases, this is not true however, because modern optical viewfinders use Fresnel designs that collect and focus light rays into our eye.  The trade-off of a Fresnel lens viewfinder is that brightness (and focus accuracy) benefits for very bright lenses disappear.  Some (fewer by the year) cameras allow these screens to be interchanged for screens with weaker (or no) Fresnel lens.  These focusing screens can focus brighter lenses more accurately, but give a dark image with slow lenses.

When using an electronic viewfinder or live view, a larger max aperture can allow for a cleaner image with a higher refresh rate when the light get low.  Unfortunately when the light is bright, many cameras automatically stop down their live view aperture for what I assume are heat-related issues; this makes depth-of-field larger than it will be in the captured image; it also makes focusing less precise.

I go into details on how aperture works in this article.

Focal Length

Focal length (along with sensor size) determine the field of view a lens will have on a given camera.  The shorter the focal length, the wider the field of view.


Focal length is a number measured in millimeters.  For a prime lens, it's a single number (such as 35 mm). For a zoom lens, it's a number range (such as 24-70 mm).  I cover the meaning of focal length in detail here.

The focal length range of zooms is convenient but note this is invariably trades for other desirable aspects.  Common trade-offs include distortion, max aperture, field curvature, and bokeh quality (but usually not sharpness, since it's a primary conversation point for people).

Another drawback of zooms is that trade-offs often vary by focal length.  For example, distortion might be fine at 50mm but poor at 17mm.  Or bokeh might look good at 35mm but not as nice at 24mm.  The list goes on...  These can make a zoom lens more difficult to fully master and predict, verses a prime.

Some people are under the misimpression that moving the camera closer to an object is similar to "zooming in" with a zoom lens while standing still.  They are not the same.  Moving the camera changes perspective where objects in the scene will change shape and relative position to one another.  While zooming, the perspective does not change.  Zooming instead has the same general effect as center cropping, but without the loss of pixels.

Maximum Magnification

Maximum magnification relates to how closely a lens can focus.

Only "macro" lenses can focus this closely


Maximum magnification is specified as a ratio (such as 1:1, 1:2) and represents how large of an image a lens can project in-focus.  A 1:1 ratio means that a "life sized" image can be projected on the sensor.  Such a lens is a macro lens.  Most non-macro lenses do not do nearly this well.  For example, a Canon 50mm f/1.4 has a maximum magnification of about 1:6.

If you plan on photographing flowers or other small objects, maximum magnification is an important aspect to consider.

Performance Aspects

These aspects represent imaging performance qualities of a lens that designers can control (often trading off one for another).  These are not obvious in spec sheets, although some aspects can be estimated if you read a published MTF chart.

Center Sharpness (Resolution)

Center sharpness is the measurable detail captured at the center of an image.

Under test conditions, center sharpness represents the resolution of a lens.  For human perception, a combination of resolution and local contrast collaborate as "perceived sharpness".

Resolution capability varies by aperture with wide apertures limited by aberrations and narrow apertures limited by diffraction.  Both of these limits are explored later in this article.

Center sharpness is where most people start and, unfortunately where many end when evaluating a lens.

Resolution is revealed when the image is viewed very large and can be invisible at smaller sizes or greater viewing distances.  Contrast-based sharpness can easily be added by software.  It appears as sharpness at smaller sizes and can appear as sharpening artifacts under magnification.

Resolution measurements are loaded with complications which you should be aware of when researching them:

  • Lens testing sites will often list sharpness as pure numbers but don't really give you a feel for what the difference is.  For example, if one lens can do 2500 lines per picture height and another can do 2700, under what conditions will this even be detectable?  It's generally left unexplained...
  • Changing a camera sensor changes the resolution numbers for the exact same lens:
    • It's intuitive to think of a lens-sensor system as a "weakest link" system where the worst component will limit the resolution.  This intuition is incorrect.  Resolution will increase with a higher-megapixel camera, even for even for cheap lenses.  As an example, check out this same lens tested on three camera bodies and note how higher sensor resolution makes overall resolution numbers better too.  The mathematics are described here.
    • Some sensors use a strong antialiasing filter, while others have none.  Antialiasing filters help prevent false color artifacts in well-focused fine-detail objects (like feathers and fabric), but they lower resolution as a result.  To see the trade-offs of antialiasing filters, I prepared this link.  The D810 sample in upper right image in the test has no antialiasing filter and shows higher resolution in trade for false color.
  • Transforming a RAW image into a visible image often involves a contrast-enhancing sharpening step (adding the illusion of resolution via local contrast).  If a tester is not controlling this variable, it can influence the results greatly.
  • Finally, sharpness varies per copy of the same lens, sometimes widely.  When you see a test number on a website, was it a good copy or a bad one?  For additional context, see Roger Cicala's excellent article on the subject of testing and variance.  For this reason, I'm skeptical of resolution results from single lens copies.

Quick Test: You can check lens testing sites such as DXOMark, Photozone or Lenstip, but understand the limitation described above.  Another test is to simply take pictures under good lighting and see for yourself.

Corner Resolution

Pretty much all non-damaged lenses have less measured resolution in the corners than in the center.  This is less a real-world problem than you might guess.  For example, corner sharpness rarely matters in portrait photography.  As a test, consider looking through your recent photos to determine how much it matters for you.

Again, with landscapes, corner sharpness is mostly irrelevant until f/8 (full frame).

Quick Test:

I usually do an infinity test where I focus on a distant tree (pine trees work nicely)  Some people do non-infinity testing, but this requires very precise alignment to avoid invalid and misleading results.

I first take a photo with the tip of the tree centered.  If enabled, auto focus should be turned off after taking the first shot. Shutter speed should be at least 3x the focal length (e.g. 1/150 or higher for a 50mm lens) or use a tripod.  After the shot, confirm good focus with magnified review.

The upper left image has a distant pine tree tip centered and focused.  In the shots that follow, the pine tree is placed in each corner.

To complete the test, I pan and take a photo with the tree tip in each corner.  Remember, auto focus must not be enabled or a focus change could invalidate the result.

I do this test wide open and stopped down to f/5.6 or f/8.

I evaluate results at a computer, comparing magnified views of the the center with the corners.  The center can be sharper than corners on a perfect lens copy (due to it's design).  If the corners have different sharpness relative to one another, the lens might be decentered.  If you find a difference, I recommend testing again later to prove consistency.  If you have other lenses or cameras, it might be good to try mixing them in to eliminate possible testing errors as well.  If you still have issues, read this, then make your choice about returning the lens :)

Now the brutal test of comparing each corner at 100%, not for the faint of heart! :)

Flare Resistance

A lens with poor flare resistance readily shows flaring artifacts when there is a bright light source in the frame (such as the sun).

A lens with good flare resistance can still show flare, but in more extreme cases, like a bright light in a frame corner.

Most (if not all) lenses have better flare resistance to lights in the center than the corners.  Flare resistance is an important aspect in landscape photography and, unfortunately, many landscape-oriented lenses do more poorly here than one would hope.  Last year, I rented a $1,500 landscape lens which I will never be tempted to buy - the sole reason is the disappointing flare results I saw.

Flare manifests itself in three main ways.

One is reduced contrast, either in part of or all of the frame.


Another is a series of colored discs (or other shapes) in the image.  Sometimes these can be quite pronounced.


Finally, you may see "beams" of light emanating from a bright light source, such as a the sun,


Flare is a bit tricky to test as no lens is fully immune to it.  That said, it's definitely more of an issue on certain lenses.

Flare is clearly also usable in pleasing artistic ways but it can be annoying if that's not the intent or if the flare renders unfavorably (e.g. a strong contrast reduction or giant purple discs).

A classic way to reduce flare is to use a lens hood, although this works best when the light source is out-of-frame.  Another, less satisfying, approach is to adjust composition.  Sometimes very slight adjustments can make a big difference.

Quick Test: If you have a somewhat wide angle lens, take a few pictures with the sun in different parts of the frame.  Longer focal lengths can be used too but note that the sun will be more intense and can put your equipment and eyes at greater risk.  For longer lengths, try the moon or a bright street light instead.

Focus Shift

Some lenses (especially "fast" lenses) can suffer from focus shift.  Focus shift is where the focus plane changes based on chosen aperture.  Since many cameras focus wide-open, this can create a difficult-to-resolve focus problem.

Focus shift can especially manifest itself when an afflicted lens is slightly stopped down.  In other words, if you have a f/1.4 lens with focus shift, it might focus perfectly at f/1.4, look a little off at f/2.0, then be fine again at f/4.0 (where the depth of field is large enough to hide the slight change).  Avoiding the "danger zone" aperture settings can be an effective workaround, but an annoying one.

Quick Test: A Google search for the lens model plus "focus shift" should be enough.  If you feel like experimenting, try photographing a wall or focus chart "wide open", then stopped down a slight amount.  Remember to use manual focus or the test results will be invalid.

Coma

Coma is a quality where the out-of-focus "circle of confusion discs" stop looking like circles.  It contributes to muddy-looking corners, especially if the corners are not in focus.  Many bright and wide angle lenses show coma, even "perfect" copies due to the large menu of trade-offs involved in designing these optics.  Damaged lenses with misplaced elements can show it as well.

Quick Test:  Lenstip does coma tests; see if they tested your lens.  You can alternately take a photo with the corners slightly out of focus.  Do the corners look natural or muddy?

Astigmatism

This is an effect where horizontal and vertical light rays don't focus on the same plane.  In specialized tests such as lasers entering the lens, you would be able to see how lasers coming in horizontally and vertically would focus in different places.  With general light that's coming in from all directions, the image will lose it's "crispness" and be unable to focus sharply at any setting.

Astigmatism is usually not a big issue with non-damaged lenses.  Stopping down the lens is an effective way to limit the effect if it's showing up.

Quick Test: Lenstip measures and reports on astigmatism.

Chromatic Aberration

Lenses bend light using refraction and refraction naturally creates dispersion.  In simple terms, different colors of light are refracted (bent) slightly differently by glass.  Unless you are using a simple magnifying glass, your lens has additional elements to try and balance this out but all things in lens design involve trade-offs and 100% correction may not be achieved.  Higher megapixel cameras tend to make CA's look worse because they scrutinize these details more.

Chromatic Aberrations have a two major (and several secondary) forms:
  • Lateral: In this case, different colors are projected on the sensor in slightly different places.  This creates a fringing effect.  This problem is mostly correctable in Lightroom and other tools, even in-camera.
  • Longitudal: In this case, different colors are focusing in front or behind the sensor.  This is not easily fixed as some of the light has actually lost detail (it's out of focus).  Correction software that tries to fix this generally use de-saturation tricks that may degrade the image.
  • Secondary Longitudinal:  This type relates to colors that are outside of the focus plane.  It's very common, especially in very fast and wide lenses, for color fringing to occur in high  contrast out-of-focus areas.  This will appear as "purple bokeh fringing" in front of the focus plane and "cyan bokeh fringing" behind it.
Quick Lateral CA Test: High contrast lighting brings these out.  A classic example is backlit tree branches on a sunny day.  Try a few different apertures and view at high magnification.  As mentioned above, some forms of CA can be fully fixed by software, such as Lightroom.  Note: if the problem areas are not in perfect focus, it's may not be lateral CA, but longitudinal CA.

The entire image, note there are CAs in this image but the image is not large enough to see them.

Lateral Chromatic Aberrations from the top-left corner of  the photo above.  Note the purple on the branch edges.  High contrast scenes such as this one bring it out.


The same image after a "one click" correction in Lightroom

Quick Longitudinal CA Test:

Shoot a piece of white piece of paper with black text at an angle.  Exposure should be set so that the paper is very bright (but not clipping).  Try wide open, then stopped down a couple of stops.  Compare the results.


In this really tight crops shot "wide open", you can see evidence of purple fringing in front of the focal plane and cyan fringing behind.  This is secondary longitudinal CA.

When the same lens is stopped down to f/8, the CAs are reduced.

Transmission

Some lens coatings/materials/designs reduce chromatic aberrations, flare or other issues in trade for even spectrum transmissions.  For example, they might reduce the intensity of some of the blue/magenta spectrum.  The result can be colors that look "off" and are difficult to correct.

There are "hear-and-there" reports of color issues when using third-party lenses. One argument of consideration is that the third-party lens coatings are not matched with the color filter arrays present in the camera bodies.  I'm not saying "never buy a third party lens", as I own one myself, but be conscious that color fidelity issues with these lenses are not unheard of.

Another aspect of transmission is light loss.  Due to transmission loss, a lens may be slightly darker than it's aperture specification may imply.  In video applications, this is prioritized thus cinema lenses are marketed in "T-stops".  A t-stop is a virtual f-stop where light losses are factored in.  An an example, a f/1.8 lens might be a T2 lens (allowing as much light through as a perfect f/2 lens).

Quick Test: Shooting with flash, manually set your cameras white balance to "flash".  Also set JPEG settings to "natural" or "neutral".  Now take photos of people, and colorful things (even a color chart if you have one).  Does the resulting color look correct or do you have to play with them? (Caveat: the problem may not be the lens and may be your monitor.  If the colors look bad, try a few other lenses to compare)


Distortion

An animation of an image from my Tamron 17-50mm (at 17mm) before and after distortion correction


Distortion is when lines that are supposed to be straight look "curvy".  Distortion can be partially addressed in post processing using several tools (including Photoshop, Lightroom, and Hugin).  That said, correcting heavy distortion will degrade image resolution.

Shorter lenses will have a fundamentally harder task correcting distortion than longer ones.  Zooms also have a bigger problem with distortion than primes with larger zoom ranges (e.g. 18-300) correlated to more severe problems which vary by focal length setting.

Distortion is important when photographing subject with expected straightness, such as interiors and architecture.  Photographs of nature tend to make distortion less obvious.

Quick Test: Distortion is reported by both Photozone and Lenstip.  If you want to experiment yourself. try photographing a brick wall.  Do the lines look straight?

Field Curvature

Field curvature is where the focal plane not a flat surface.  All lenses have some of this but it's too slight for relevancy on a well-corrected lens.

I can only image how many perfectly working wide angle lenses have been returned because they have field curvature and someone "tested" them for proper centering by shooting a brick wall.

Field Curvature is also more a problem with shorter focal lengths (and zooms)  Macro lenses are specifically designed to try and minimize field curvature (so they can be used for copy work).

Since landscape lenses are often short, this is where field curvature is likely to become an identifiable issue.   With these lenses, better overall focus can be achieved by focusing near the corners as opposed to the center.

Quick Test: Start with a Google search.  Test by focusing a flat brick wall and comparing center and corner sharpness (review the corner sharpness section above to account for decentering).  If field curvature is found, you may still find the lens quite usable if focused carefully.

Vignetting

Vignetting is a darkening of the image toward the corners.  It's much more common with larger sensors.  It also nearly always worse when a lens is used "wide open", rapidly improving as the lens is stopped down.

I consider vignetting to be a minor issue in the digital age, unless it's excessive.   This is especially true as the use cases where vignetting is a concern (such as landscapes) are the same ones where the lens is stopped down.  One exception (there's always exceptions) is when stitching together images, vignetting can create issues with the stitching...

The same image with an added Vignette on the bottom.  It's much easier to add these than remove them.

Quick Test: Lenstip and Photozone both measure and report on Vignetting.  You can test yourself by photographing a bright and uniform object, such as a white wall or the sky.

Physical Limitations

The limitation below (diffraction) applies to all lenses.  It's important to understand because it a limitation that affects even the most expensive equipment.

Diffraction

Diffraction is a general phenomenon that applies to all wave-like phenomenon (light included) when the waves encounter an obstruction.  No lens design can prevent diffraction artifacts.

This image shows a tiny section of a brick wall captured at different apertures.  The top row represents 100% crops of a 24 megapixel image.  The bottom row represents 100% crops of a 2.5 megapixel image.  Note how diffraction prevents high resolutions from being achieved at high f-stop numbers.
Diffraction appears as "fuzziness" in an image, especially noticeable in areas that should have the "sharpest focus".

Diffraction increases as f-sop increases and is fundamentally linked with depth of field.  Due to diffraction, you have to trade resolution potential for depth of field and this trade-off is the same for all sensor sizes.  A work-around for this limit is to angle the focus plane with a tilt-and-shift lens or view camera.

Usability Aspects

The usability aspects below are not directly related to image quality but are instead related to convenience and flexibility.

Filter Support

Some shorter lenses (popular in landscape) have bulb-shaped front elements.  This makes adding filters a serious pain.  ND and polarizing filters are powerful assets in both landscape and product photography.  I'll probably cover details in a future article.

The size of filter is also a factor with smaller sizes being much cheaper.  For example, a Hoya ND400 filter currently costs $71 in 77mm and $35 in 49mm.  If you go with higher-end filters, the price difference will be magnified ever further.

Full Time Manual Focus

Most cameras offer a "auto focus | manual focus" setting.  Lenses with full-time manual focus can be manually focused at any time, regardless of the camera's setting.

This is a convenience feature which makes the camera more pleasant to use.  With lens that gets a lot of manual focus (such as macro and landscape), it can be a big factor in usability.

Focus Throw

Focus throw indicates how many degrees the focus ring needs to be turned between infinity and full close-up.  More throw allows for more precise but slower focusing.

Electronic Focusing

Newer mounts (sony E-mount, Micro 4/3rd) often have the manual focus ring actually attached to sensors.  Electronics read these sensors and tell the autofocus motor to change focus.  I've seen good implementations of this and really terrible ones (The Sony RX100 and Fuji X100 are both terrible, the Fuji X100T improves on the X100 greatly).

I've yet to use an electronic focusing system that I liked better than a mechanical one.  In theory, it's possible by offering a long (or configurable) throw.

One thing you generally lose with electronic focusing is distance scales and hard stops.  Both losses decrease the general utility of the lens, especially short lenses and macro lenses.

Focus Markings

It's becoming more rare at this point, but some lenses still have focus markings such as scales and depth-of-field guides.  These can be quite useful in some types of photography such as landscape and street.  With time, you can "learn" the positions that work for certain types of shots, speeding up your work and reducing errors.

Focus markings work best on shorter lenses, where there is a bit more focusing tolerance and zone/distance focusing works more reliably.

Internal Focus

Most older lens designs move the outer element (or all elements) for focus.  An increasing number of modern designs move hidden inner elements instead.  Moving inner elements can offer advantages in terms of weather sealing and general protection.

Image Stabilization


Image stabilization helps steady the camera during handheld shooting.  It has upsides and downsides.  It's a bit complex to go into all of it here, but some basic thoughts are.
  • Verses a tripod, it's more flexible and convenient but the results are not as repeatable or reliable
  • It makes the lens more complex and prone to be outdated.
  • A lens with IS can ironically, blur photo in some situations.  For example, a tripod-mounted camera with IS turned on can lead to less "crisp" photos.
  • The shorter your lens, the less you need IS and the less you should want it due to the downsides.  With longer "action" lenses, IS can be a real asset.  An ideal use case for IS is when shooting wildlife handheld.

Focus Motor Type

Most older lens designs dive auto focus by a motor in the camera.  Newer designs nearly always have the motor in the lens.  There are trade-offs...

The upside of a motor in the lens is that focusing is quiet.  Focusing can also be very fast with some "hypersonic ring" designs.

The main downsides are cost and sometimes long-term reliability.

My thought on this subject is that the value of in-lens focus motors vary by application.  For wildlife and sports, they are a real asset.  For landscape, a full manual lens can be preferred as landscape compositions are (arguably) best focused manually.

Included Hood

Some may consider this minor, but I think its important to mention that some manufacturers sell their hoods as a separate (and overpriced) "accessory".  While, this may be justifiable on inexpensive lenses, I think expensive (> $500) lenses should include a hood in the box.

There are also lenses that come with built-in hoods (retractable, screw-on, etc), many of very nice build quality.  Some of these, however, are not removable which can create issues mounting filters.

Weather Sealing

Some lenses have "weather sealing".  When paired with a weather sealed camera body, shooting in a light rain should be less stressful.  Some people take this to an extreme and wash their gear under running water.  I would not recommend pushing your luck!

Beyond water intrusion, a weather sealed body/lens should do a better job keeping out dust particles.

Build Quality

I'll end with the hardest to precisely define quality of a lens.  It comes down to materials, tolerances, smoothness and the general consensus that good copies are common and "bad" ones are a rarity.

Some say that the final image is all that matters and from a certain point of view (the image viewers) they are absolutely correct.

From the photographers point of view, however, there is also the aspect of "image making" and build quality definitely has an effect on how enjoyable and reliable this process can be.  When a photographer is enjoying the process and can rely on the gear, better photos can easily result.

It's also nice to order a new lens and be confident that the first one you get will be a nice one.  Manufacturers do not all score equally here - currently (2015) Canon seems to be a slight leader in terms on consistency in their latest lenses (source), but there is no perfect solution at the prices we are willing to pay.

Summary

When buying a lens there are many factors to consider, so many that it is natural to feel overwhelmed.  For this reason, I recommend being aware of different factors, but deciding what matters to you by renting/borrowing the lens and giving it a "test drive".