Showing posts with label intermediate. Show all posts

Monday, March 28, 2016

Wide Angle Lenses - How to choose, How to use

Topic

Interested in wide angle photography?  This article walks though how to use a wide angle lens and how to shop for one.

What is a wide angle lens?  Let's literally take a look:


In the photo above, the outer blue box shows the view from a wide angle lens (a 15 mm full-frame equivalent with a 110 degree field-of-view).

The inner blue box shows the framing you would see from a typical cell phone camera if you were standing in the same spot. (40 mm equivalent with a 56 degree field-of-view)

With this example cell phone, you could back up to get more rocks and shore but this is not going to give you the same image as the wide angle.  For starters, the distant shoreline won't change much in size when you move back, making it much larger in the 40 mm than it currently is in the 15 mm version.  Essentially, the relative sizes of all near and far objects will be less different with the longer lens.

Thus the only way to get the same wide angle image with our example phone camera would be to do a panoramic stitch.

Uses

The main uses for a wide angle lens are:

Landscape

Canon Beach - taken with a 15mm lens (APS-C) with an 88 degree FOV


As shown above, a wide angle lens can capture more of the overall landscape scene in a single image and thus provide a "different" look than what most people can achieve with their phones or travel cameras (unless they do a panoramic shot and these don't always work out well).

Interior

Wide angle lenses give interiors a feeling of "spaciousness" (15mm image shown)
Wide angle lenses also make car interiors look larger, as this 11 mm image shows.

Real-estate photographers usually opt for wide angle lenses when photographing interiors because the exaggerated perspective creates a feeling of spaciousness - making rooms appear larger in photos than they will in person.  Car interior photos are often wide angle for the same reason.

Architecture

A wide angle lens was used here to help show the scale and complexity this old railroad avalanche shelter

Architecture photos often use wide angle lenses, both for practical reasons (limitations on where the camera can be placed with a clear view), and because wide angle lenses give more options for cropping.  Cropping (or shifting) is needed when the photographer wishes to avoid keystoning effects.

An example of "keystoning" where angling the camera causes parallel lines to angle toward one another.  If this is not the desired effect, shooting the scene with a "leveled" camera, then post-cropping is one strategy.  Using a wide angle lens can help.

Less Popular Uses

To start, I'll say you can attempt to use any lens for any purpose but the following uses "go against the grain" and thus enter the realm of creativity.

  • Close Portraits: To get a person to "fill the frame" with a wide angle lens, you have to get the camera very close.  This creates personal space challenges which can make many people less comfortable.  The other potential problem is that the resulting image will reflect the close perspective, rendering a larger nose, smaller ears, and a unusually-shaped head.  Although this can be a fun way to be creative, people usually prefer traditional methods.
  • Macro or Product:  It's quite common for a wide-angle lens to be able to focus very closely, even an inch away from the front of the lens.  Outside of exaggerated perspective, the issue here is the effect of the camera lens on lighting - the lens can actually block useful light from reaching the subject!

Issues, With "Work Arounds"

Wide angle lenses are a challenge to use well and come with many inherent compromises.  This section attempts to cover the major ones.

Distracting Elements In The Frame

Because wide angle lenses capture so much in a single image, it can be a challenge to keep distracting elements out.  This can especially be difficult when starting out under a "single subject" compositional mindset.

My advice here is to shift compositional thinking to "whole image".  This means first looking for a favorable wide-angle environment, then looking for specific subjects after that.  I highlight some specific examples below:

A beautiful sky is a nice time to go with a wide angle lens.  The sky can cover a good portion of the frame in a complimentary way.  Water is another good compositional component for the same reason.
Oftentimes, the sky is not interesting enough to deserve space in the frame.  In this case, consider minimizing it in favor of more landscape elements.
Large areas of a given pattern can work well to simply an image and avoid distracting elements.

Finding A Subject

If your photo is built on a singular subject, you'll often have to get close to that subject or it will be too small to "stand out".  Some tips for doing this are shown in the images below.
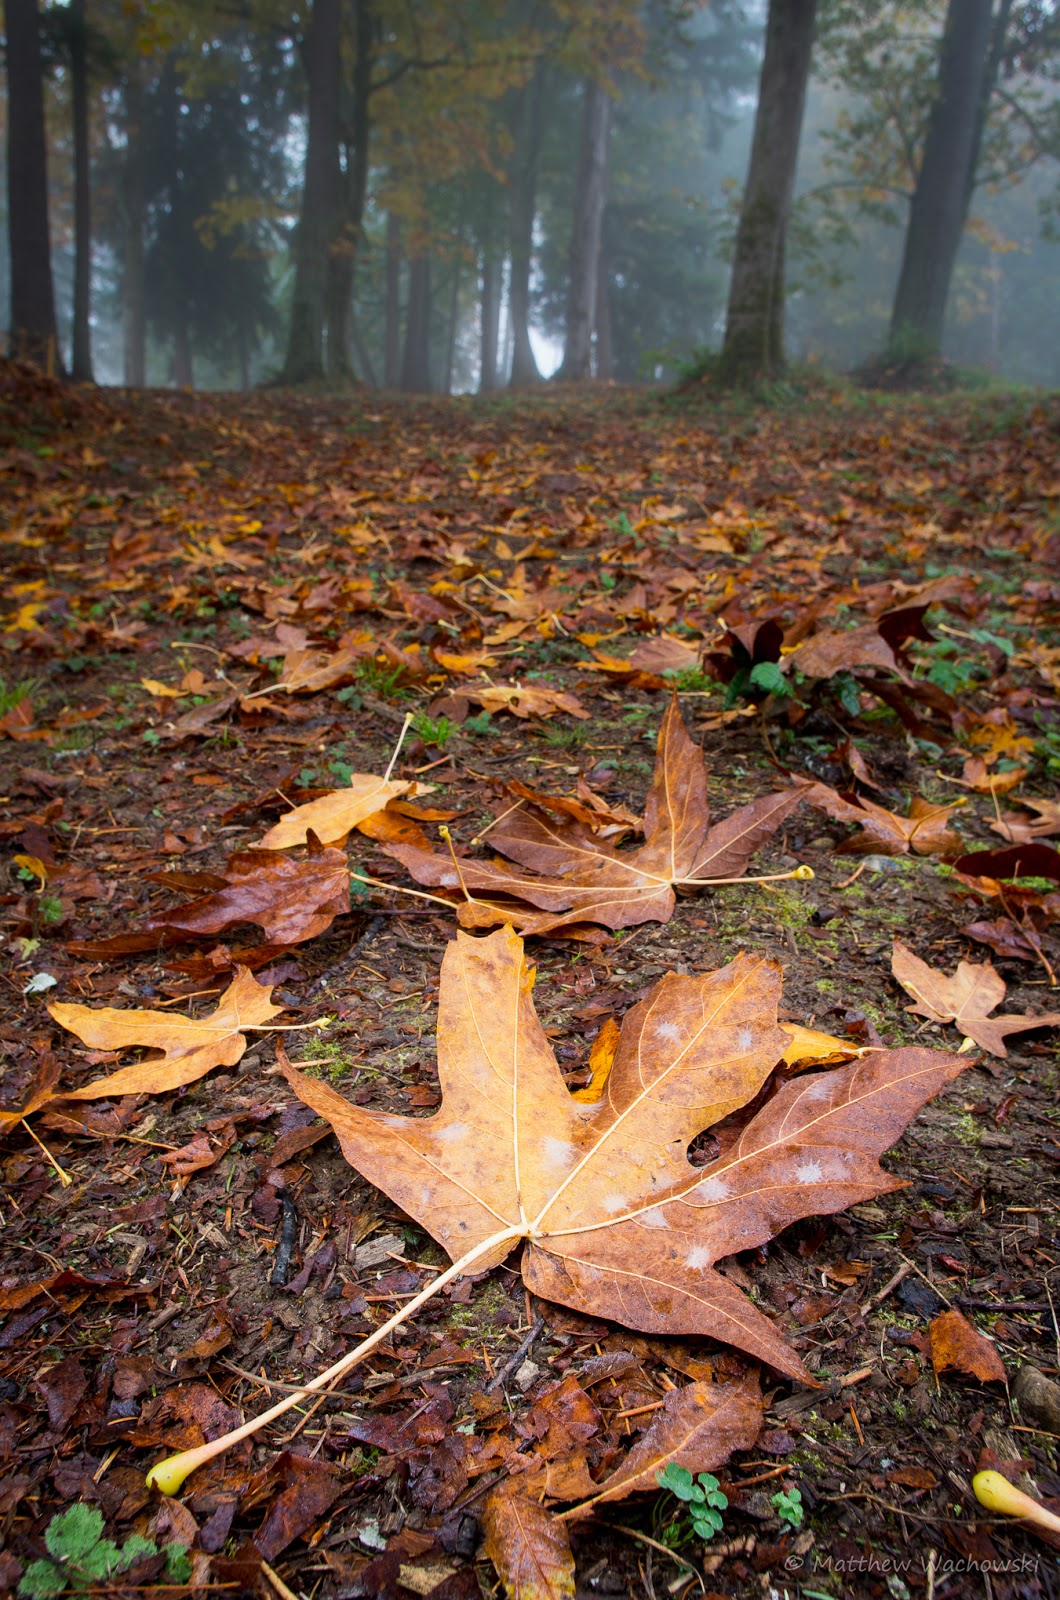


Getting the camera very low to the ground allows small objects to be used as a subject


Another option is to allow the subject to be small and build the composition to embrace this smallness

With natural subjects, such as trees, it's often possible to get very close without the resulting perspective distortion becoming bothersome.  This image was taken with a 10mm fisheye lens at a very close distance.

Subject Background Balancing

Background objects taken with a wide angle lens become very small, almost too small to be a part of the photo.  Because of this, distant features such as mountains should mostly be considered an "inconsequential" part of the composition.  Foreground objects and sweeping objects (sky, landscape) need to mostly carry the image.

An image of Mt Rainier with a 100 mm lens.  Long lenses make it easier to include background elements, although this feature can bring  with it a sense of two-dimensional "flatness" to the image. 


An image captured from the same shoreline with a 15mm lens.  See how Mount Rainier in the distance (left of center) has become nearly irrelevant to the composition?  Anything not close up or vast in wide-angle tends to become marginalized.

Distortion

It took me a while to realize this, but distortion can mean a combination of several separate issues:
  • Lens distortion:  This is a tendency for lenses to make straight lines look curved.  On some wide angle lenses, it's complex where lines in certain dimensions (say parallel to the frame) are straight where others (say toward the camera) have a curve.
  • Perspective distortion:  This is a natural distortion where objects that are actually to the side of the camera suddenly have to be projected onto a flat rectangle.  The result is strange-looking bending and warping near the edges of the frame.
  • Keystoning:  Oftentimes the effort of getting a good composition means tilting the camera up or down.  This action causes straight lines to bend toward or away from the frame.  The keystoning effect is not limited to wide angles but tend to be exaggerated by them.
Some examples:

Note the severe unnatural bend of the boat masts on the right.  This is a combination of perspective distortion and keystoning (angling the camera upward)

Another example, where boat masts become progressively more angled to the right of the fame

One workaround for these problems is to simply go a little less wide as the issue becomes increasingly harder to keep under control as you go wider.

Another is to try and place objects without obvious proportions nearer to the frame edges.  Natural objects like water, rocks and trees tend to work well.  Man-made objects like buildings and signs make it more obvious that something is "off".

A third method is to try and keep the camera level to minimize the effect, perhaps with some post cropping after-the-fact.  This is a trade-off that you'll have to apply your artistic discretion toward.

Finally, you can simply embrace the effect, even try to exaggerate it - it's all subjective opinion at the end of the day, after all. :)

Field Curvature

Although it's natural to think of a focus plane as a flat plane in space, in reality it's never quite so simple. Wide angle lenses, in particular, have quite a difficult time keeping the focus plane "flat" (to varying degrees).  Also note that this curvature is a part of the design compromises in the lens, swapping copies of the same lens model is a frivolous exercise.

Why does it matter?  Mainly because you need to be careful how you focus.  If you don't then you can expect problems like soft corners that can otherwise be avoided.

To address this issue, you will have to see if and how much it's a problem for your lens.  If it's a problem, you'll have to experiment with what part of the frame you use for focusing.  For my favorite wide-angle, the "recipe" for best overall landscape focus is to focus about 1/4 away from the bottom corner of either frame.

What To Look For

This section talks about things to consider when purchasing a wide angle lens. 

Flare Can Be A Problem

By their nature, wide angle lenses capture light from many angles.  Designing a lens that keeps flare low in these situations is a challenge that many lenses (even expensive ones) don't meet too well.  To make matters worse, lens hoods often have to be sparse to prevent vignetting issues.

The best way to determine if a lens has too much flare is to rent or borrow it and decide for yourself.  You can also check a review site like lenstip.  Finally, you can visit a "samples" site like pixelpeeper or flickriver.  On these sites, you can choose the lens you are interested in and check out images with the sun or bright lights.

Don't Forget About Filter Support

Filters are quite useful in landscape photography.  ND filters can allow for long shutter speeds, showing the flow of things like leaves and water.  Polarizing filters can reduce glare on objects, improving color and clarity.  Even color filters are still useful in digital if you are using advanced techniques (like RGB channel balancing with ETTR).  We won't cover details in this article...

The issue I'm getting to here is that many wide-angle lens designs use a "bulb shaped" front element.  This design can improve sharpness but filters are difficult and often expensive to mount, requiring creative after-market approaches.

The Nikon 14-24mm is a lens of legendary sharpness.  Unfortunately it's flare resistance is only "OK" and adding filters to the bulb-shaped element requires expensive after-market workarounds.
The Pentax 15 mm contrasts the Nikon 12-24mm in nearly every respect.  Image sharpness is good, but not "legendary".  Then again, the flare resistance is excellent and inexpensive 49 mm filters can be easily attached.

Note that polarizers don't work too well on very wide angle lenses of any type due to the extreme light angles.  This leads to vignetting on the edges of the frame.  For moderate wide angle lenses, they are fine.

Good Manual Focus > Auto Focus

At least for most people.  The reason is that the depth of field is so large on wide angle lenses that zone focusing is effective.

This Sigma 10-20 has a "high speed internal motor".  I prefer a great manual focusing experience for this type of lens.


The Zeiss 21mm is $1800 and is manual focus only.  It's a very nice manual focus too...  Too bad the lens flares a bit too much.


Another reason is that, due to field curvature, you'll probably want to focus using magnified live view.  Manual focusing benefits from a long focus throw which autofocus lenses generally do not have, making live view focusing more precise.

For the reasons above, many of the most expensive wide angle lenses are manual focus only.

Focus Scales Are Nice

A lens with focus scales is nice with wide angle because you can "learn" what scale positions work well for certain shots.  This can save time and also provides a sense of confirmation that things are setup correctly.

No focus scales on the Sony 16-35mm.  This means there is no way to zone focus the lens and you'll have to do your best with the LCD.

Weather Sealing Is Nice

Although uncommon in less-expensive lenses, weather sealing is a nice feature in any lens intended to be used in outdoor landscapes

Weather sealed with focus scales and filter support.  A strong contender :)

Wide Angle Zooms Can Be Tough To Master

Basically, all wide angle lenses have their "quirks" like field curvature, flare, etc that you have to learn to predict and work around.  With a zoom lens, these quirks often vary by focal length, making it even harder to pre-visualize your results.

The complexity of zooms might also make decentering a higher risk as there is simply more that can go wrong.

I also found that it's not always obvious which wide angle focal length to pick.  For these reasons, I have gravitated to primes when using wide angles.

Software Stitching Can Emulate Wide Angle - Sort Of

In modern times, you can also put your camera (with a regular lens) on a tripod (or even handheld) and photography many images in a grid.  You can then use a tool like Hugin or Microsofts Image Composite Editor to stitch them together - and both tools are free!

The downside is that making a wide angle image this way is a lot more work.  Another problem is that movement in the frame can create big problems, even ruin an attempt completely.

Summary

Wide angle lenses can be a real asset and are quite a bit of fun to use.  That said, they are specialty lenses and often bring more problems than benefits in a "typical" photography scenario.

If you are interested in wide angle, my advice would be to rent before you buy and get a feel for what it's like to use such a lens.  I'd try a few from primes to zooms, even a fish eye, and simply see if it's something you enjoy.  Have fun!

Sunday, March 13, 2016

Creativity

I feel that I've written enough technical articles in the past couple months and now it's time to talk about something more important: creativity.

Photographers often discuss what makes a photo a "good photo", referring to composition, level horizons, etc.

To me, a factor that really makes a image stand out is when it has a sense of uniqueness.  A second factor is when every aspect of the photo comes together in a unified way, usually as a message or just a pure emotion.  Photos that can do both of these things tend to be special and very difficult to create.

Let's focus on the first aspect in terms of creativity.

This article shares a bit of my personal story of creativity.  It includes images I have taken over the years that I consider creative efforts, including some that I have never shared due to thinking they were "not good enough".  Thus, I'm not implying that creative efforts alone make these photos "good", but I am stating that they helped me tremendously in my personal growth.

2012 was my first year of "creative photography" via a 365 project.  I think it led to images that are not "technically superb", yet still have an enduring quality that outlast their technically superior peers I captured at that time.

The goal of this article is to inspire you to prioritize creativity and to give suggestions on how to nurture it.

Maybe this article is not limited to photography...

The Birth of Creativity

Creativity comes from the marriage of an idea that feels novel and the motivation to explore the idea.

Using bokeh to simulate a spectrum

Creativity never guarantees a remarkable result.  Perhaps the idea felt novel, but is actually common.  Perhaps motivation can not cover for the lack of skill, knowledge and luck needed for a good result.

But remarkable results are, by definition, not easy.  If they were, then everyone could easily achieve them and they would thus lose their quality of being remarkable.

Whether you are running a race, competing for a job or trying to excel at an art, the game is always the same: put in the work that unlocks your natural potential and try to overcome the inevitable series of setbacks and obstacles that come naturally with progression.

Thus creativity should not be thought of as a "shortcut" to success but as a building block toward a goal and ultimately a vision (more on that in a future article, perhaps).  Many attempts at creativity will feel like failures as they tread on unfamiliar ground. This feeling of failure can push a person toward past "safe successes" but these failures should be viewed as valuable opportunities for education and improvement.
During this shoot, I noted the "fiery effect" of the first image, then changed settings outside of my normal comfort zone to make it more pronounced.  I then tried different tones, eventually feeling that red treatment was a bit too blunt.


Success and failure are two sides of a double-edged sword.  One provides natural feelings of motivation but little in terms of learning potential.  The other does quite the opposite.  I believe you need a balance both to keep moving forward.  Success motivates, failure teaches.

This image is a "refined by experience" version of others that I have shared before.  I feel "safe" with the share and can predict the reaction but there is little opportunity in terms of personal growth.

Nurturing Creativity

Make it a Priority

To nurture creativity, you need to first give it priority.  A quick test:
  • Look at your last 25 different photos (e.g. not duplicates of the same thing)
  • How many gave you a feeling that you were pushing a personal boundary and were not sure how or if they would work out?
  • If the number is less than 5, maybe more priority is needed...
by the way: my own test of this experiment (in March, 2016) shows that I need to give creativity more priority - I'm playing it too safe right now...

Force Discomfort

"Forcing Discomfort" means creating an environment where it's hard to take the photos that are in your comfort zone - spiritual duplicates of photos you have taken many times before.  Here are some examples:
  • Do you depend on amazing lighting conditions?  Try going out in the middle of the day or during overcast conditions.
  • Are you a master of subject isolation with depth of field?  Try using only your mobile phone.
  • Do you post process every image in Photoshop or Lightroom?  Set your camera to JPEG mode and try some of the creative filters.
  • Do you always crop?  Try to go a month without ever cropping a photo.
  • Do you never crop?  Try to go a month cropping every photo to a 1:1 square or other ratio.
  • ... and so on


I very rarely shoot with a long lens and this is one of only five images I captured in 2015 using one.  Perhaps the difference is what led me to "see" the potential of framing this the image with an intent to vertically "flip it", thus creating a near-subconscious source of tension and interest.

I don't recommend changing too much though.  I think that changing too much at once can give a "fish out of water" feeling that is not productive.  Instead, I recommend forcing only one or two differences and keeping the rest in your comfort zone.  This should encourage exploration and discovery along that new path.


This image of falling Jenga blocks was a challenge to capture in that it combines a blurring ambient exposure with a motion-freezing "flash".  From an external perspective "it's been done" but I had feeling of creative motivation during the process and this pushed my knowledge forward.

Also note that the goal here is not to find an easy path to amazing images, quite the opposite is likely.  Instead the goal is to gain knowledge and spark ideas.

Apply Vision

Vision in terms of a single image is the concept of "seeing" a photo in your mind months or years before you capture it.  You set the stage in your imagination, perhaps while listening to interesting music or in a special place of reflection.

What follows is a series of "attempts", each of which captures part of, but not all of the vision.  Some lucky visions might truly be found, and these images will be special.

My advice is to do what it take to personally get your creative thinking engaged (visiting a favorite quiet place, etc), and coming up with "idealistic" ideas that can then be chased and hopefully achieved.

My "first opportunity" of a photo vision I had for about a year before finding the image.

My "second" opportunity of the same vision, taken a year later.  It's still only about 70% there.  I hope to have another opportunity in the future that gets even closer...


Flash Cards

Here is an idea that I sometimes use.  Get some flash cards and write down idea fragments - one per card.  My personal cards look something like this (one per card)

  • ND Filter
  • Flower
  • Long Exposure
  • Fill Flash
  • Macro
  • Zoom blur
  • Light Painting
  • Tree
  • Infrared
  • Dancer
  • ... and so on
I wouldn't worry about rules in making your cards - rules are the enemy of creativity after all.

Flower + Vignette + Zoom Blur
After you have enough, shuffle and draw three.  Think about various combinations of the three cards.  Any ideas?  Write them down to think more on later.  Try a few times and see how it goes!

More Thoughts?

If you have thoughts or tips on creativity you would like to share, I'd love to hear them below!


Sunday, February 21, 2016

Exposure - In Depth

Exposure - In Depth

Exposure is one of those overloaded terms in photography that has an several explanations which are not really usable in an interchangeable way - they are actually talking about different things.  This situation leads to endless arguments over semantics as well as people having a hard time grasping more advanced concepts due to picking "the wrong model".

What is the right model?  I prefer the "official" one, derived from scientific units.  The official model makes it possible to understand many concepts (explained later), such as ETTR, "isoless", dynamic range, etc as concise concepts within the exposure family.

This article covers the official definition of exposure and also the alternate "exposure triangle" form that seems to be taught to beginners.  This article explains the differences and highlights situations where the exposure triangle model breaks down.  Finally, this article briefly covers a number of topics, such as Dynamic Range, HDR, ETTR, and explains how these relate to exposure.

This article is probably too much information for beginners to absorb in one sitting.  If you are a beginner, I recommend reading this article one section per day and mixing in other articles and lots of experimentation.  Have fun!

Official Definition

The official units for exposure are lux-seconds.   Let's build it up a piece at a time:

 A lumen is based on how our eyes perceive light energy - think "brightness".

A lux is defined as "one lumen per square meter".  With lux, we can talk about how much light is striking an area.

Exposure takes lux and adds a time component.  Now we can talk about "how much light is striking an area over a time period":

exposure = lux * seconds
         = lumens * second
           ---------------
            meter * meter

I do not expect math to be everyone's forte, but the above is basically saying that the following matters in exposure:
  • Light Intensity - measured in lumens
  • Time - measured in seconds
  • Area - measured in square meters
Modern energy-efficient light bulbs report their brightness directly in lumens

Understanding The Ratio

As a ratio, the square meters area component can be cut up in different ways.  An analogy is your drive into work, which can be measured as miles/hour or kilometers/hour.  You can use different things for the "per hour" part:
  • You can think of the whole trip, giving an average speed
  • You can think of the minimum or maximum speed during the trip
  • You can draw a graph that tells how fast you were going for each second
  • You can create a histogram that counts how many seconds you were at each speed
The "per hour" part of a drive to work can be thought about in many ways.  For example maximum speed (40 mph), minimum (0 mph), average (20 mph), and much more.

With exposure, it's the same concept, with image area being the denominator variable:
  • There is average exposure across the entire image
  • There is a minimum and maximum exposure within the image (in digital, it would be the most exposed vs least exposed pixel)
  • There is exposure at every pixel, which is the raw image itself.
  • There is a histogram which gives populations of pixels at each exposure level
Just like the drive to work, the "image area" denominator of  exposure can be looked at in many ways.  You can look at the maximum, minimum, average, or a small area.  Also note, that the above image does not tell us what the actual exposure was at capture time.  More on that later...

What is the Purpose of Exposure?

Exposure, as it varies across an image, literally provides the light-based information available to build an image from.

Exposure serves a second purpose in that digital sensors and film need some of it and can't take too much of it.

In film

Light exposure causes a silver reaction, forming a silver salt.  For example silver bromide to silver halide (not the only possibility).

Not enough exposure means the silver crystals fail to reach activation energy.  When the negative is subsequently developed, all of these crystals wash away from the film, leaving only the plastic base.  In these cases, there is no detail to recover.

An example of an underexposed film image.  Most of the silver crystals have literally washed away during development - no detail will be recoverable here.


Too much exposure means that most of the silver crystals have reacted, yet there are always a few here and there that can still activate.  This leads to a gradual highlight roll-off.  In development, these highly exposed areas will be very dark and dense on the film which can make scanning and printing details in these area more challenging (but, unlike washed away low-exposure crystals, it can still be done).

An example of an overexposed film image of ice crystals.  Details are very dark but are still present.  With enough exposure under an enlarger or scanner, an image with reasonable (not optimal) detail can still be recovered.

In Digital

Not enough exposure in digital is less well defined.  Basically digital very efficiently captures even tiny amounts of light but there is a "noise floor" that can hide this light, making it invisible.

Interestingly enough, even when the light level is very low, it's possible to take many near-identical noisy images and "average them" to cancel-out the noise.  This advanced technique is used in astrophotography and other applications that have to work with very low light.

This image has underexposed trees on the left side.

Here I did some extreme brightening to  to show what "underexposure" in digital means.  The trees were raised in exposure by 6 stops!  (I explain stops later in this article)
A closeup of the severely brightened area, showing there is still detail there, but also noise.

Too much exposure in digital causes the digital "bean counter" pixel bins to saturate.  Say a given digital sensor's pixel can tell you a brightness value from 0-1000.  Once it hits 1000, it's will keep saying 1000, no matter how much additional light hits it.  This means that highlights in digital exposed to this level are simply not possible to recover.
To say a bit more, we can know that the number was more than 1000 but can't tell if it's 1,001 or 10,000 or any other number over 1000.

Many camera manufacturers tweak their exposure algorithms to create a "safety gap" from over exposure.  The result is that most images have a bit more noise than necessary, but fully-blown highlights are less common.  Of course, you can always override the camera's suggestion (for example, by shooting in RAW and using manual exposure mode)


The upper-left of this image has been purposefully overexposed by shooting in manual mode.  No amount of "debrightening" can recover the details

Here is what happens when we try anyway...

By The Way: Exposure is not Image Brightness

This is an area where countless people seem to be confused.  Let's start with an example:


Which images above are overexposed and which are underexposed?

The correct answer is that you can't tell what the exposure was.  The images above are all the same image, but were brightened to different levels.  I could just as easily make an image with more exposure appear less bright than one with less.  Thinking back to the original units:
  • Light (lumens)
  • Time
  • Area
There is no place for post-brightness changes in the definition of exposure.  Exposure is what happens when the camera captures the image, not what software in your computer or camera does later in post processing.

In film, the same brightness argument holds.  You can affect negative densities with development time and technique and you can further affect print brightness with enlarger exposure time choices and paper choices.

Why does this matter?  Because understanding concepts like dynamic range, preserving highlights, ETTR, etc are all simplified when you remove image brightness from the conversation - image brightness has zero influence in the capture process of all of these and simply serves to confuse and complicate the concepts.

Exposure Values do not Consider ISO

ISO is a simple way to think about how a given exposure relates to image brightness.  This seems like a contradiction to the last section.  This contradiction is resolved below...

In Film


ISO determines how much exposure is needed to get the film to a given density when using recommended development technique.

Varying the development technique (especially time) will cause the density to vary as well, with shorter times leading to less density (and lower contrast) and longer times leading to more density (and higher contrast).  This is also known as "pushing" and "pulling" and can be used both to compensate for exposure variances and as an (advanced) way to control the overall dynamic range preserved.  Thus ISO is only a "following all rules" measurement.

Also, as explained in the previous section, film density is just a starting point for printing - it's more accurate to say that film contains image detail than image brightness.

In Digital


Digital has multiple definitions for ISO.  The one that is most-accepted is the exposure needed to achieve 18% "middle grey" in the final JPEG result.  This definition makes ISO related only to final image brightness at a given exposure.

Remember from above that brightness can be changed independently of what was captured.  Indeed, just about every company maps their raw sensor values to JPEGs a little differently - trading off general image noise for highlight protection.

If you have your camera set to produce JPEG images (which is the only choice for some), then you are mostly stuck with the brightness mapping options the camera offers you, although some light post processing seems to be ok.

If your camera can produce RAW files, you can map exposure to final brightness in a more fundamental way, giving more flexibility.

Complex?  Ok, increasing ISO in digital can be thought of a basic way of post-brightening a given exposure.  Using ISO to brighten an image reveals more image noise.  Actually providing more light avoids the noise.

The Beginner's "Exposure Triangle"

Many sites explain exposure using the "exposure triangle", like this:


The idea is that you can get more of one factor by giving up one of the others.  This is true and useful but "exposure triangle" is a misleading name...

This triangle contains ISO... but as explained above, changing ISO does not change exposure.  Because ISO can not change exposure, It's quite easy to break this triangle in many real world situations:
  • If the camera is in a pitch black room, no amount of changing ISO, aperture, or shutter speed is going to affect the fully-black image
  • If a camera takes two pictures with identical aperture/shutter/iso settings, but one has flash activated, the image will have very different exposure, yet the triangle does not reveal this.  Is flash a special case?  Does it need to be?
  • The same can be said when adding a neutral density (or any) filter.
  • What about changing weather conditions, or if a cloud goes over the sun?  All camera setting were the same -- yet exposure, as defined in lux * seconds, changed.
Basically the exposure triangle falls short in describing the options you have for controlling light (flash, filters, etc).  It also mixes exposure and brightness together in a way that falls short of what's actually possible.

One might argue that the "exposure triangle" is not meant to be exposure, and despite it's shortcomings is a useful model for beginners.  This is a reasonable argument, but it's still unfortunate that so many cases and situations in every day photography fall into the exception path of the exposure triangle model.

I initially learned with this triangle and feel that it tended to hold me back in I was thinking about photography situations in terms of ISO, shutter speed and aperture - In many of these cases, thinking about lighting and flash options would have led to better images.  YMMV.

The "Real" Exposure Triangle

The real exposure triangle derives directly from the units of exposure.  It is:


In this model, it's all about exposure and how to get more or less of it.

Basically, you can make a change in the triangle that lessens exposure and either accept more post-capture image brightening (and noise), or you can compensate the exposure change somewhere else in the triangle.  That's it!

Unlike the exposure triangle, it's not covering "side effects" directly (such as more or less depth of field) but leaving those to be explored on their own terms.  All post-exposure image brightening (including ISO) are left out of the model.

In this model:

Light sources provide light, examples include:
  • The sun
  • Use of flash
  • Light bulbs
Light filters throw away light that could used (hopefully in trade for some desired outcome), examples include
  • Aperture Setting with smaller apertures allowing in less light (more noise) in trade for more depth-of-field.
  • Neutral Density Filters:  These filters absorb some of the light.  Why do that?  The primary practical reason is to purposely force a slower shutter speed.
  • Polarizing Filters: These filter out non-polarized light, which is a separate subject but essentially reduces some types of glare.  Anyway, the non-polarized light that's filtered away can no longer be used for exposure.
  • Color Filters: Color filters work by blocking some of the light from other colors.  Less light means less exposure.
  • Clouds
  • Shade from trees, buildings, etc
Shutter speed  is simply how long the light is allowed to collect.

Shutter speed is the most assuming factor in the triangle. It's assuming light sources are uniform throughout the exposure.  Flash, which is only active for 1/10,000 of a second, does not adhere to this assumption.  As a result, light bursts added by flash can not be influenced by shutter speed.  You might image other cases (flashing lights, traffic at night), but I feel they are too off-topic for coverage here.

Model Summary

The above definition defines exposure in a way that is consistent with units, covers many more of the "exceptions" that the previous triangle can not, and prepares us for deeper understanding.

What's a "Stop"?

A stop is a exposure difference that represents exposure being doubled or halved.  Increasing exposure by one stop means doubling it.  Decreasing exposure by one stop means halving it.

The purpose of a stop is to allow us to think about exposure calculations (in either triangle above) in a way that allows for simple addition and subtraction.  Thinking about exposure in something other than stops requires harder math, and who wants to do hard math during a photo shoot?

In terms of shutter speed, stops are easy to think about, 1/8 second is 1 stop darker than 1/4 second and that's 1 stop darker than 1/2 second.

This also means that 1/8 second is 2 stops darker than 1/2 second.

In terms of aperture, stop calculations would be easy if we were talking about the area of the aperture hole, but aperture is defined in terms of the hole diameter instead.  You might remember in math that circle area is related to diameter as area = pi * radius * radius  or equivalently:  pi * diameter * diameter / 4.  You can thus decrease light by one stop by converting diameter to area, halving the area, then converting back to a diameter.  Let's do it for "fun".  If reading the math below sounds boring, just skip to the bold conclusion and be happy:

At 50mm, f/2 = 50/2 = 25 mm diameter

area = pi * diameter * diameter / 4
     = 3.14159 * 25 * 25 / 4
     = 490.87 mm*mm

1 stop slower => new_area => area / 2 = 245.44 mm*mm

new_diameter * new_diameter = new_area * 4 / pi

new_diameter = sqrt(new_area * 4 / pi)
             = sqrt(245.44 * 4 / 3.14159)
             = 17.68 mm

new_fstop = 50 mm / 17.68 mm = f/2.83 ~ f/2.8

Thus f/2.8 is one stop darker than f/2

You might notice that the math above can be simplified.  Indeed for any focal length, f/2.8 is one stop darker than f/2.

Clearly, most people don't break out the math when calculating aperture, instead they just memorize or look up the stops where each is "one stop slower" than the last:

  • f/1
  • f/1.4
  • f/2
  • f/2.8
  • f/4
  • f/5.6
  • f/8
  • f/11
  • f/16
  • f/22
  • f/32
  • ... and so on


Using Stops In The Field

Thinking about exposure in stops is convenient because you simply add them and subtract them to make various trade-offs and it's "simple" math to do in your head, once you get enough practice...

 For example, if you are happy with an exposure at 1/100 sec, f/8, you have all sorts of options for making changes while keeping the exposure the same:
  • Add a stop of aperture (f/5.6) remove a stop of shutter speed (1/200)
  • Remove two stops of aperture (f/16) add two stops of shutter speed (1/25)
  • If using flash, remove a stop of aperture (f/11) and double the flash power (which adds one stop of light).  Note that shutter speed can not make a change to the exposure contribution of the flash because the flash happens so fast that it makes the shutter speed irrelevant.  This is a topic for another article.
  • Add a 3 stop neutral density filter, open up the aperture one stop (f/5.6) and cover the other two stops with a longer shutter speed (1/25)
  • We could go on and on forever.
Note, you can also reduce the shutter speed by 1 stop (1/200) and increase ISO by one stop (say ISO 100 to ISO 200) to get the same resulting JPEG image brightness.  This is not the same exposure though, and the resulting image will have more noise as it applied more brightening to less available light.

Stops Don't End With Aperture and Shutter Speed

As heavily implied by the "real exposure triangle" above, everything that affects light has something to say about stops.  This includes:
  • Flash : You can double and half flash "power" to add/remove stops.  You can also use the inverse-square law to do so (too much depth to cover here, but basically moving the flash closer and farther away).
  • Any light source
  • Filters of all types, which will tell you their estimated light loss (in stops) in their specification.

A Quick Overview Of Concepts Related To Exposure

Now that exposure is (hopefully) understood, terms can be described more clearly.

Dynamic Range


Dynamic range is an overloaded term.  It can refer to (at least) these two things.

  • Scene dynamic range: The difference between maximum and minimum exposure value in a frame as measured in tiny areas.  It's measured in stops using a spot meter.
  • Camera dynamic range: How many stops are between a pixel's high-saturation point and the point where the signal-to-noise gets too excessive to call the pixel "clean".  This number is muddled by the fact that my clean pixel might not be your clean pixel.  It's further muddled by the fact that averaging pixels together reduces noise, thus downsizing an image can increase measured dynamic range.
Dynamic range is measured in stops.

High Dynamic Range (HDR)


The semantics police were definitely on vacation the day that HDR was born.  Officially, High Dynamic Range means successfully capturing an image that contains a good deal of dynamic range between the highlight and shadow areas.  This was somehow convoluted to include:

  • Bracketing (taking multiple images at different exposures and combining them).  Bracketing certainly improves dynamic range but many of the latest cameras have a high dynamic range without needing to employ this practice - they can get it in one capture.
  • Tone Mapping.  In the context of HDR, tone mapping means mapping a high dynamic range image to a lower dynamic range output device.  For example, say you have an image with 14 stops of dynamic range.  That's great but your monitor can only display 9 and your print/lighting combination can only show 6.  Deciding how to resolve this is known as "tone mapping."  Tone Mapping involves squeezing some high and low pixels into the target space and mapping others to pure black or white.  It's an art and sometimes the results are convincing, other times very "artsy" :)  Note that tone mapping is (nearly) always used for non HDR images too, analog film included.  Without some tone mapping, images tend to look "flat" and unappealing.
It's common for people who don't understand HDR deeply to bracket and heavily tone map low dynamic range scenes that the camera could easily handle in one shot with no mapping.  Such is the result of the convoluted definition...

Isoless

An ISOless camera sensor is a sensor where it's very difficult to measure the noise difference between an image taken at a high ISO and that same image (with the same exposure) taken at a lower ISO, then brightened later in post-processing. 

When a camera is ISOless, it can pay dividends to actually shoot at a low ISO, then raise it later.  The reason is that the low ISO photo will contain additional dynamic range that the high-ISO capture discarded.


Both of these images were taken with the same exposure (1/25 @ f/2.8).  One image was taken at ISO 1600.  One was taken at ISO 100 then brightened 4 stops in Lightroom.  Can you see any differences?

ETTR (Exposure to the Right)

Noise is a part of every image, film or digital.  The more exposure you are able to give, the more this noise is defeated by actual image signal.  ETTR is the digital-only practice of giving your sensor as much exposure as you can, but no more.  Too much exposure, and pixels start getting saturated, losing their ability to tell us anything.  Just a tiny bit less than too much, and noise is minimized across the image.

Note that ETTR is not over or under exposure, it's an optimized exposure that optimizes for low noise (and optimizing for noise is not always what you want, such as when shooting action).  As we covered above, the brightness that you get is not an exposure-related concept.

ETTR assumes that you will be adjusting the brightness to your taste later.  There is also a bit of an art in ETTR in allowing some pixels to saturate because you don't care about losing the detail and would rather get more shadow detail captured.  A prime example is the sun.  If the sun is fully white in post, we can work with that, especially if some of the darker areas give more detail in trade.

There is much to cover on ETTR and I'll likely cover more in a future article.

Sensor Size "Equivalence"

This is a never-ending argument with one side saying:

  1/100 second with f/2.8 in micro forth thirds is equivalent exposure to 1/100 second with f/5.6 in "full frame" 35mm

and the other says

  no, f/2.8 = f/2.8 on any format

Who is right?

Well, they are both right because they are talking about two different things.

The f/2.8 = f/2.8 argument is talking about photographic exposure in terms of

lumens * seconds
---------------------
meters * meters

And, yes, sensor size is irrelevant here, it's factored out by the denominator.

But the equivalent statement is multiplying by an area.  Thus it is talking in terms of these units:

lumens * seconds

and since the area of a full frame sensor is 4 times larger than micro four thirds, you do indeed need two additional stops of exposure to get the "lumens * seconds" values to be equal on both sides. 

Maybe calling it an "equivalent exposure" is where the trouble lies as the semantics of "exposure" are loosened.  If we had a popular term for "lumens * seconds" measurements, then some of the semantic quibbling might be reduced...

So both sides are right but the practical implications are different:
  • The "f/2.8 = f/2.8" correctness is interesting when trying to meter a scene. 
  • The "f/2.8 u43 = f/5.6 ff" correctness is interesting when thinking about how many lumen * seconds are contained in an image (which itself correlates strongly to image noise).

Limitations and Further Considerations

This article does not expand on the color aspects of exposures that vary by color, which is an interesting more advanced topic.  As a simple example, it's possible to overexpose only a single color channel (say red), while the other channels (green, blue) are not even close.  In this situation, an advanced photographer might choose to use a color filter (aqua) to get additional exposure, fixing the color balance later.

Photographic Exposure is measured in lux * seconds.  Remember that, since lux is derived from human vision, it does not directly represent how digital sensors or film chemistry function.  Instead photographic exposure is a model of what light-based information these technologies are trying to successfully capture.  Understanding how cameras actually record light requires further research into the subject.