Exposure - In Depth
Exposure is one of those overloaded terms in photography that has an several explanations which are not really usable in an interchangeable way - they are actually talking about different things. This situation leads to endless arguments over semantics as well as people having a hard time grasping more advanced concepts due to picking "the wrong model".
What is the right model? I prefer the "official" one, derived from scientific units. The official model makes it possible to understand many concepts (explained later), such as ETTR, "isoless", dynamic range, etc as concise concepts within the exposure family.
This article covers the official definition of exposure and also the alternate "exposure triangle" form that seems to be taught to beginners. This article explains the differences and highlights situations where the exposure triangle model breaks down. Finally, this article briefly covers a number of topics, such as Dynamic Range, HDR, ETTR, and explains how these relate to exposure.
This article is probably too much information for beginners to absorb in one sitting. If you are a beginner, I recommend reading this article one section per day and mixing in other articles and lots of experimentation. Have fun!
This article is probably too much information for beginners to absorb in one sitting. If you are a beginner, I recommend reading this article one section per day and mixing in other articles and lots of experimentation. Have fun!
Official Definition
The official units for exposure are lux-seconds. Let's build it up a piece at a time:
A lumen is based on how our eyes perceive light energy - think "brightness".
A lux is defined as "one lumen per square meter". With lux, we can talk about how much light is striking an area.
Exposure takes lux and adds a time component. Now we can talk about "how much light is striking an area over a time period":
exposure = lux * seconds
= lumens * second
---------------
meter * meter
I do not expect math to be everyone's forte, but the above is basically saying that the following matters in exposure:
- Light Intensity - measured in lumens
- Time - measured in seconds
- Area - measured in square meters
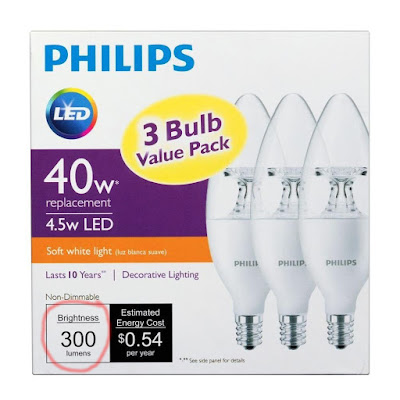 |
| Modern energy-efficient light bulbs report their brightness directly in lumens |
Understanding The Ratio
As a ratio, the square meters area component can be cut up in different ways. An analogy is your drive into work, which can be measured as miles/hour or kilometers/hour. You can use different things for the "per hour" part:- You can think of the whole trip, giving an average speed
- You can think of the minimum or maximum speed during the trip
- You can draw a graph that tells how fast you were going for each second
- You can create a histogram that counts how many seconds you were at each speed
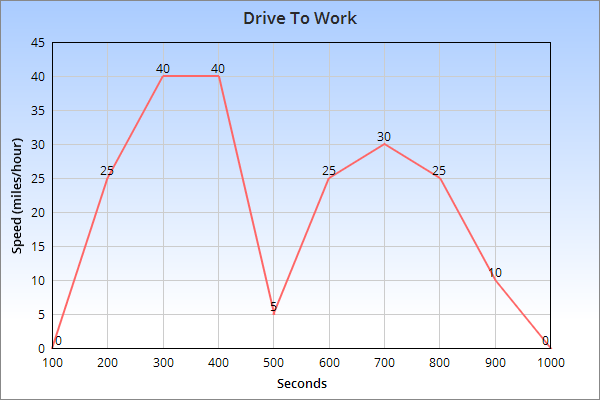 |
| The "per hour" part of a drive to work can be thought about in many ways. For example maximum speed (40 mph), minimum (0 mph), average (20 mph), and much more. |
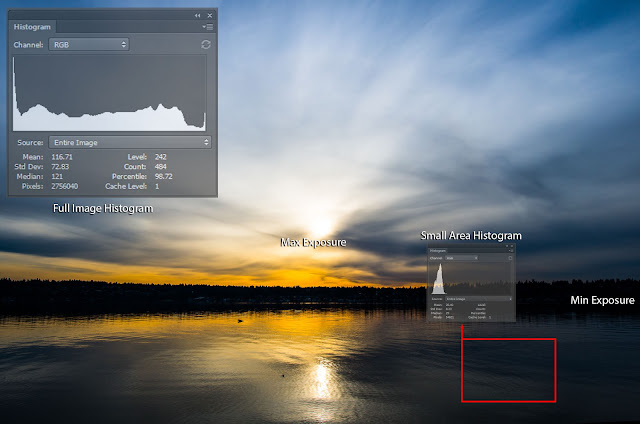
With exposure, it's the same concept, with image area being the denominator variable:
- There is average exposure across the entire image
- There is a minimum and maximum exposure within the image (in digital, it would be the most exposed vs least exposed pixel)
- There is exposure at every pixel, which is the raw image itself.
- There is a histogram which gives populations of pixels at each exposure level
What is the Purpose of Exposure?
Exposure, as it varies across an image, literally provides the light-based information available to build an image from.
Exposure serves a second purpose in that digital sensors and film need some of it and can't take too much of it.
In film
Light exposure causes a silver reaction, forming a silver salt. For example silver bromide to silver halide (not the only possibility).
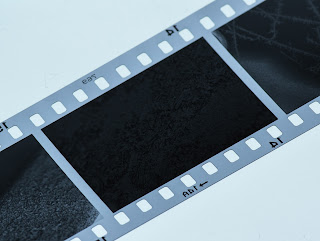
Not enough exposure means the silver crystals fail to reach activation energy. When the negative is subsequently developed, all of these crystals wash away from the film, leaving only the plastic base. In these cases, there is no detail to recover.
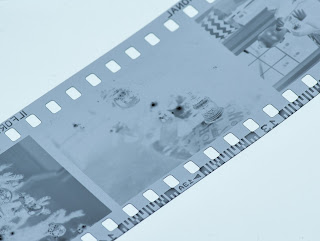 |
| An example of an underexposed film image. Most of the silver crystals have literally washed away during development - no detail will be recoverable here. |
Too much exposure means that most of the silver crystals have reacted, yet there are always a few here and there that can still activate. This leads to a gradual highlight roll-off. In development, these highly exposed areas will be very dark and dense on the film which can make scanning and printing details in these area more challenging (but, unlike washed away low-exposure crystals, it can still be done).
In Digital
Not enough exposure in digital is less well defined. Basically digital very efficiently captures even tiny amounts of light but there is a "noise floor" that can hide this light, making it invisible.
Interestingly enough, even when the light level is very low, it's possible to take many near-identical noisy images and "average them" to cancel-out the noise. This advanced technique is used in astrophotography and other applications that have to work with very low light.
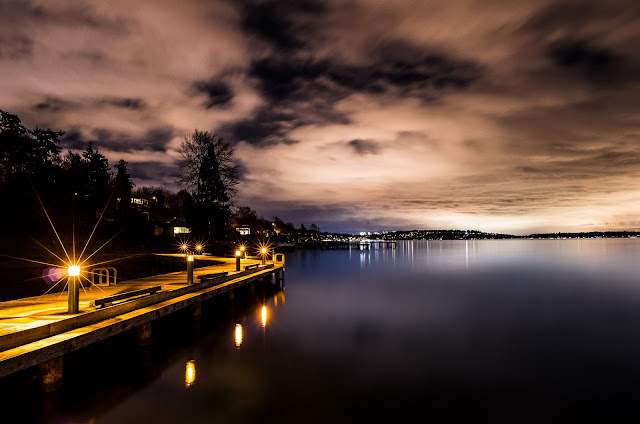 |
| This image has underexposed trees on the left side. |
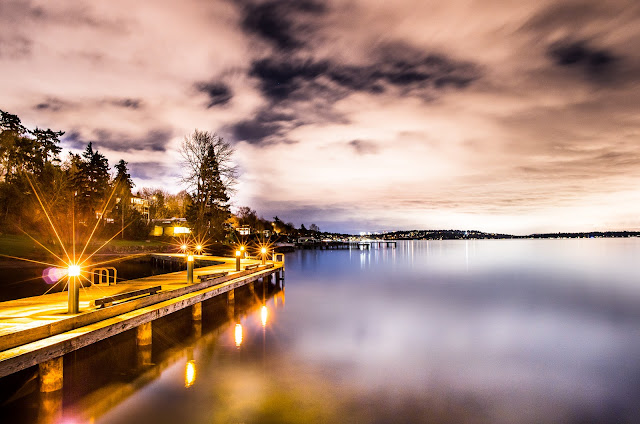 |
| Here I did some extreme brightening to to show what "underexposure" in digital means. The trees were raised in exposure by 6 stops! (I explain stops later in this article) |
Too much exposure in digital causes the digital "bean counter" pixel bins to saturate. Say a given digital sensor's pixel can tell you a brightness value from 0-1000. Once it hits 1000, it's will keep saying 1000, no matter how much additional light hits it. This means that highlights in digital exposed to this level are simply not possible to recover.
|
To say a bit more, we can know that the number was more than 1000 but can't tell if it's 1,001 or 10,000 or any other number over 1000.
Many camera manufacturers tweak their exposure algorithms to create a "safety gap" from over exposure. The result is that most images have a bit more noise than necessary, but fully-blown highlights are less common. Of course, you can always override the camera's suggestion (for example, by shooting in RAW and using manual exposure mode)
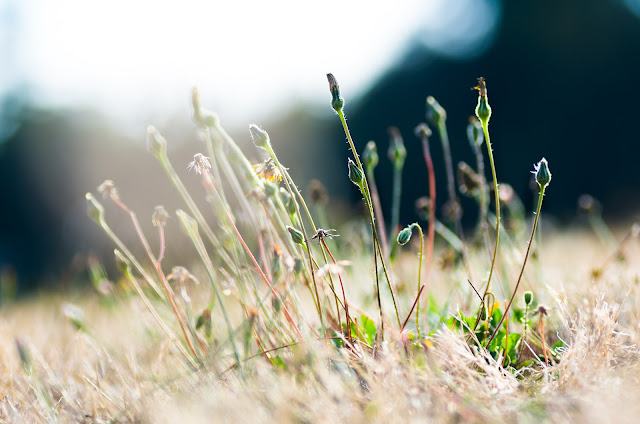 |
| The upper-left of this image has been purposefully overexposed by shooting in manual mode. No amount of "debrightening" can recover the details |
By The Way: Exposure is not Image Brightness
This is an area where countless people seem to be confused. Let's start with an example:
Which images above are overexposed and which are underexposed?
The correct answer is that you can't tell what the exposure was. The images above are all the same image, but were brightened to different levels. I could just as easily make an image with more exposure appear less bright than one with less. Thinking back to the original units:
- Light (lumens)
- Time
- Area
There is no place for post-brightness changes in the definition of exposure. Exposure is what happens when the camera captures the image, not what software in your computer or camera does later in post processing.
In film, the same brightness argument holds. You can affect negative densities with development time and technique and you can further affect print brightness with enlarger exposure time choices and paper choices.
In film, the same brightness argument holds. You can affect negative densities with development time and technique and you can further affect print brightness with enlarger exposure time choices and paper choices.
Why does this matter? Because understanding concepts like dynamic range, preserving highlights, ETTR, etc are all simplified when you remove image brightness from the conversation - image brightness has zero influence in the capture process of all of these and simply serves to confuse and complicate the concepts.
Exposure Values do not Consider ISO
ISO is a simple way to think about how a given exposure relates to image brightness. This seems like a contradiction to the last section. This contradiction is resolved below...
In Film
ISO determines how much exposure is needed to get the film to a given density when using recommended development technique.
Varying the development technique (especially time) will cause the density to vary as well, with shorter times leading to less density (and lower contrast) and longer times leading to more density (and higher contrast). This is also known as "pushing" and "pulling" and can be used both to compensate for exposure variances and as an (advanced) way to control the overall dynamic range preserved. Thus ISO is only a "following all rules" measurement.
Also, as explained in the previous section, film density is just a starting point for printing - it's more accurate to say that film contains image detail than image brightness.
Also, as explained in the previous section, film density is just a starting point for printing - it's more accurate to say that film contains image detail than image brightness.
In Digital
Digital has multiple definitions for ISO. The one that is most-accepted is the exposure needed to achieve 18% "middle grey" in the final JPEG result. This definition makes ISO related only to final image brightness at a given exposure.
Remember from above that brightness can be changed independently of what was captured. Indeed, just about every company maps their raw sensor values to JPEGs a little differently - trading off general image noise for highlight protection.
If you have your camera set to produce JPEG images (which is the only choice for some), then you are mostly stuck with the brightness mapping options the camera offers you, although some light post processing seems to be ok.
If your camera can produce RAW files, you can map exposure to final brightness in a more fundamental way, giving more flexibility.
Complex? Ok, increasing ISO in digital can be thought of a basic way of post-brightening a given exposure. Using ISO to brighten an image reveals more image noise. Actually providing more light avoids the noise.
The Beginner's "Exposure Triangle"
Many sites explain exposure using the "exposure triangle", like this:
The idea is that you can get more of one factor by giving up one of the others. This is true and useful but "exposure triangle" is a misleading name...
This triangle contains ISO... but as explained above, changing ISO does not change exposure. Because ISO can not change exposure, It's quite easy to break this triangle in many real world situations:
This triangle contains ISO... but as explained above, changing ISO does not change exposure. Because ISO can not change exposure, It's quite easy to break this triangle in many real world situations:
- If the camera is in a pitch black room, no amount of changing ISO, aperture, or shutter speed is going to affect the fully-black image
- If a camera takes two pictures with identical aperture/shutter/iso settings, but one has flash activated, the image will have very different exposure, yet the triangle does not reveal this. Is flash a special case? Does it need to be?
- The same can be said when adding a neutral density (or any) filter.
- What about changing weather conditions, or if a cloud goes over the sun? All camera setting were the same -- yet exposure, as defined in lux * seconds, changed.
One might argue that the "exposure triangle" is not meant to be exposure, and despite it's shortcomings is a useful model for beginners. This is a reasonable argument, but it's still unfortunate that so many cases and situations in every day photography fall into the exception path of the exposure triangle model.
I initially learned with this triangle and feel that it tended to hold me back in I was thinking about photography situations in terms of ISO, shutter speed and aperture - In many of these cases, thinking about lighting and flash options would have led to better images. YMMV.
The "Real" Exposure Triangle
The real exposure triangle derives directly from the units of exposure. It is:
In this model, it's all about exposure and how to get more or less of it.
Basically, you can make a change in the triangle that lessens exposure and either accept more post-capture image brightening (and noise), or you can compensate the exposure change somewhere else in the triangle. That's it!
Unlike the exposure triangle, it's not covering "side effects" directly (such as more or less depth of field) but leaving those to be explored on their own terms. All post-exposure image brightening (including ISO) are left out of the model.
In this model:
Light sources provide light, examples include:
- The sun
- Use of flash
- Light bulbs
- Aperture Setting with smaller apertures allowing in less light (more noise) in trade for more depth-of-field.
- Neutral Density Filters: These filters absorb some of the light. Why do that? The primary practical reason is to purposely force a slower shutter speed.
- Polarizing Filters: These filter out non-polarized light, which is a separate subject but essentially reduces some types of glare. Anyway, the non-polarized light that's filtered away can no longer be used for exposure.
- Color Filters: Color filters work by blocking some of the light from other colors. Less light means less exposure.
- Clouds
- Shade from trees, buildings, etc
Shutter speed is simply how long the light is allowed to collect.
Shutter speed is the most assuming factor in the triangle. It's assuming light sources are uniform throughout the exposure. Flash, which is only active for 1/10,000 of a second, does not adhere to this assumption. As a result, light bursts added by flash can not be influenced by shutter speed. You might image other cases (flashing lights, traffic at night), but I feel they are too off-topic for coverage here.
Shutter speed is the most assuming factor in the triangle. It's assuming light sources are uniform throughout the exposure. Flash, which is only active for 1/10,000 of a second, does not adhere to this assumption. As a result, light bursts added by flash can not be influenced by shutter speed. You might image other cases (flashing lights, traffic at night), but I feel they are too off-topic for coverage here.
Model Summary
The above definition defines exposure in a way that is consistent with units, covers many more of the "exceptions" that the previous triangle can not, and prepares us for deeper understanding.
What's a "Stop"?
A stop is a exposure difference that represents exposure being doubled or halved. Increasing exposure by one stop means doubling it. Decreasing exposure by one stop means halving it.The purpose of a stop is to allow us to think about exposure calculations (in either triangle above) in a way that allows for simple addition and subtraction. Thinking about exposure in something other than stops requires harder math, and who wants to do hard math during a photo shoot?
In terms of shutter speed, stops are easy to think about, 1/8 second is 1 stop darker than 1/4 second and that's 1 stop darker than 1/2 second.
This also means that 1/8 second is 2 stops darker than 1/2 second.
In terms of aperture, stop calculations would be easy if we were talking about the area of the aperture hole, but aperture is defined in terms of the hole diameter instead. You might remember in math that circle area is related to diameter as area = pi * radius * radius or equivalently: pi * diameter * diameter / 4. You can thus decrease light by one stop by converting diameter to area, halving the area, then converting back to a diameter. Let's do it for "fun". If reading the math below sounds boring, just skip to the bold conclusion and be happy:
At 50mm, f/2 = 50/2 = 25 mm diameter
area = pi * diameter * diameter / 4
= 3.14159 * 25 * 25 / 4
= 490.87 mm*mm
1 stop slower => new_area => area / 2 = 245.44 mm*mm
new_diameter * new_diameter = new_area * 4 / pi
new_diameter = sqrt(new_area * 4 / pi)
= sqrt(245.44 * 4 / 3.14159)
= 17.68 mm
new_fstop = 50 mm / 17.68 mm = f/2.83 ~ f/2.8
Thus f/2.8 is one stop darker than f/2
You might notice that the math above can be simplified. Indeed for any focal length, f/2.8 is one stop darker than f/2.
Clearly, most people don't break out the math when calculating aperture, instead they just memorize or look up the stops where each is "one stop slower" than the last:
- f/1
- f/1.4
- f/2
- f/2.8
- f/4
- f/5.6
- f/8
- f/11
- f/16
- f/22
- f/32
- ... and so on
Using Stops In The Field
Thinking about exposure in stops is convenient because you simply add them and subtract them to make various trade-offs and it's "simple" math to do in your head, once you get enough practice...
For example, if you are happy with an exposure at 1/100 sec, f/8, you have all sorts of options for making changes while keeping the exposure the same:
For example, if you are happy with an exposure at 1/100 sec, f/8, you have all sorts of options for making changes while keeping the exposure the same:
- Add a stop of aperture (f/5.6) remove a stop of shutter speed (1/200)
- Remove two stops of aperture (f/16) add two stops of shutter speed (1/25)
- If using flash, remove a stop of aperture (f/11) and double the flash power (which adds one stop of light). Note that shutter speed can not make a change to the exposure contribution of the flash because the flash happens so fast that it makes the shutter speed irrelevant. This is a topic for another article.
- Add a 3 stop neutral density filter, open up the aperture one stop (f/5.6) and cover the other two stops with a longer shutter speed (1/25)
- We could go on and on forever.
Stops Don't End With Aperture and Shutter Speed
As heavily implied by the "real exposure triangle" above, everything that affects light has something to say about stops. This includes:
- Flash : You can double and half flash "power" to add/remove stops. You can also use the inverse-square law to do so (too much depth to cover here, but basically moving the flash closer and farther away).
- Any light source
- Filters of all types, which will tell you their estimated light loss (in stops) in their specification.
A Quick Overview Of Concepts Related To Exposure
Now that exposure is (hopefully) understood, terms can be described more clearly.
Dynamic Range
- Scene dynamic range: The difference between maximum and minimum exposure value in a frame as measured in tiny areas. It's measured in stops using a spot meter.
- Camera dynamic range: How many stops are between a pixel's high-saturation point and the point where the signal-to-noise gets too excessive to call the pixel "clean". This number is muddled by the fact that my clean pixel might not be your clean pixel. It's further muddled by the fact that averaging pixels together reduces noise, thus downsizing an image can increase measured dynamic range.
High Dynamic Range (HDR)
- Bracketing (taking multiple images at different exposures and combining them). Bracketing certainly improves dynamic range but many of the latest cameras have a high dynamic range without needing to employ this practice - they can get it in one capture.
- Tone Mapping. In the context of HDR, tone mapping means mapping a high dynamic range image to a lower dynamic range output device. For example, say you have an image with 14 stops of dynamic range. That's great but your monitor can only display 9 and your print/lighting combination can only show 6. Deciding how to resolve this is known as "tone mapping." Tone Mapping involves squeezing some high and low pixels into the target space and mapping others to pure black or white. It's an art and sometimes the results are convincing, other times very "artsy" :) Note that tone mapping is (nearly) always used for non HDR images too, analog film included. Without some tone mapping, images tend to look "flat" and unappealing.
Isoless
An ISOless camera sensor is a sensor where it's very difficult to measure the noise difference between an image taken at a high ISO and that same image (with the same exposure) taken at a lower ISO, then brightened later in post-processing.
When a camera is ISOless, it can pay dividends to actually shoot at a low ISO, then raise it later. The reason is that the low ISO photo will contain additional dynamic range that the high-ISO capture discarded.
 |
| Both of these images were taken with the same exposure (1/25 @ f/2.8). One image was taken at ISO 1600. One was taken at ISO 100 then brightened 4 stops in Lightroom. Can you see any differences? |
ETTR (Exposure to the Right)
Noise is a part of every image, film or digital. The more exposure you are able to give, the more this noise is defeated by actual image signal. ETTR is the digital-only practice of giving your sensor as much exposure as you can, but no more. Too much exposure, and pixels start getting saturated, losing their ability to tell us anything. Just a tiny bit less than too much, and noise is minimized across the image.
Note that ETTR is not over or under exposure, it's an optimized exposure that optimizes for low noise (and optimizing for noise is not always what you want, such as when shooting action). As we covered above, the brightness that you get is not an exposure-related concept.
ETTR assumes that you will be adjusting the brightness to your taste later. There is also a bit of an art in ETTR in allowing some pixels to saturate because you don't care about losing the detail and would rather get more shadow detail captured. A prime example is the sun. If the sun is fully white in post, we can work with that, especially if some of the darker areas give more detail in trade.
There is much to cover on ETTR and I'll likely cover more in a future article.
Sensor Size "Equivalence"
This is a never-ending argument with one side saying:
1/100 second with f/2.8 in micro forth thirds is equivalent exposure to 1/100 second with f/5.6 in "full frame" 35mm
and the other says
no, f/2.8 = f/2.8 on any format
Who is right?
Well, they are both right because they are talking about two different things.
The f/2.8 = f/2.8 argument is talking about photographic exposure in terms of
lumens * seconds
---------------------
meters * meters
And, yes, sensor size is irrelevant here, it's factored out by the denominator.
But the equivalent statement is multiplying by an area. Thus it is talking in terms of these units:
lumens * seconds
and since the area of a full frame sensor is 4 times larger than micro four thirds, you do indeed need two additional stops of exposure to get the "lumens * seconds" values to be equal on both sides.
Maybe calling it an "equivalent exposure" is where the trouble lies as the semantics of "exposure" are loosened. If we had a popular term for "lumens * seconds" measurements, then some of the semantic quibbling might be reduced...
So both sides are right but the practical implications are different:
- The "f/2.8 = f/2.8" correctness is interesting when trying to meter a scene.
- The "f/2.8 u43 = f/5.6 ff" correctness is interesting when thinking about how many lumen * seconds are contained in an image (which itself correlates strongly to image noise).
Limitations and Further Considerations
This article does not expand on the color aspects of exposures that vary by color, which is an interesting more advanced topic. As a simple example, it's possible to overexpose only a single color channel (say red), while the other channels (green, blue) are not even close. In this situation, an advanced photographer might choose to use a color filter (aqua) to get additional exposure, fixing the color balance later.
Photographic Exposure is measured in lux * seconds. Remember that, since lux is derived from human vision, it does not directly represent how digital sensors or film chemistry function. Instead photographic exposure is a model of what light-based information these technologies are trying to successfully capture. Understanding how cameras actually record light requires further research into the subject.
Photographic Exposure is measured in lux * seconds. Remember that, since lux is derived from human vision, it does not directly represent how digital sensors or film chemistry function. Instead photographic exposure is a model of what light-based information these technologies are trying to successfully capture. Understanding how cameras actually record light requires further research into the subject.



very interesting article, matt. these are some great tips! thanks for sharing. enjoyed seeing your photos too.
ReplyDeletebest
Thank you Betty, I appreciate it :)
Delete